When you start seeds, these 7 tips will help you get the best possible results, while equipping you to solve problems like a pro!
Image by Julio César García from Pixabay
How to Start Seeds Like a Professional Grower
There you sit, surrounded by seed catalogs. You have a head full of dreams about the best gardening season ever, flipping through pages of new cultivars to try and great new gardening tips to test out. You’re ready to start seeds: Your seed is fresh, you have an ample supply of compost bursting with life, and you have more planting space prepared than ever before.
What could possibly go wrong?
Wait! You’ve been here before, excited about your spring planting, only to end up disappointed with your seed germination rate and the health of your seedlings.
Let’s slow down to take a closer look at some of the most common problems people have when they start seeds, and talk about some of the tools available to help you get the best possible results. With a little extra effort, your seeds and your spring garden will be the talk of the neighborhood!
Image by congerdesign from Pixabay
In my work advising gardeners and farmers, the number one problem I see is people starting out with weak seedlings. Gardeners often set out with admirable efforts to save money and be self-sufficient, but they can really shoot themselves in the foot before they even step out into the garden when they start with weak seedlings.
Weak, leggy, pale seedlings usually result in plants that are anything but vigorous. When these babies are transplanted into the garden, they are not prepared to face the world. Their pale foliage is likely to burn in direct sunlight, their thin stems have trouble holding up in the wind, and their delicate health sends a loud call out to tiny predators, “Come and get it!”
You May Also Enjoy:
“How to Grow 21 Amazing Fruit Trees From Seed”
“How to Make A Side Income Selling Seeds: An Interview With Jere Gettle”
Pill bugs, which normally stick to recycling, will happily munch on your precious little seedlings even though they are not actually dead … yet.
Cutworms can endanger the best of your young plants, and they especially like the overly tender stems of plants that have had a poor start in life.
Whew! That is not how you want to start out this gardening season. So, let’s get some stocky, healthy, rich green starts going.
7 Tips for Starting Seeds Successfully
First, we want fresh, viable seed. A germination test can save time and material, but it doesn’t guarantee that your seeds are fresh. Have they been stored properly? Seeds are still the cheapest gardening investment. Be picky about who gets a spot in the seedling tray!
What about your germination mix? If you usually just scoop some soil out of the garden, stop before you kill again! Good garden soil is fine for direct seeding in the garden bed, but when you start seeds in containers, they deserve an organic mix.
You May Also Enjoy:
“TGN’s Favorite Seed-Starting Equipment”
“Does A Compost Pile Destroy Weed Seeds?”
“Grow Your Own Jack-o’-Lanterns: Learn How to Save Pumpkin Seeds”
There are some excellent mixes available for purchase, but it is so easy and fast to mix your own that it just makes sense to do it yourself. Many gardeners develop fancy secret recipes, but we are going to keep it simple.
I have had the best results using a mix made of half coir fiber and half fresh worm castings. It’s that simple!
If you don’t have access to either of those, use the very best, still moist, living compost or leaf mold. If you use compost, you should sift it before planting; you want the finest grains, not the sticky clumps.
Some gardeners sterilize their germination mix. I don’t agree. I always use ingredients with good, active biology. How would you like to be born into a little plastic cell, devoid of life? Trust in Mother Nature and use a mix with vibrant biology.
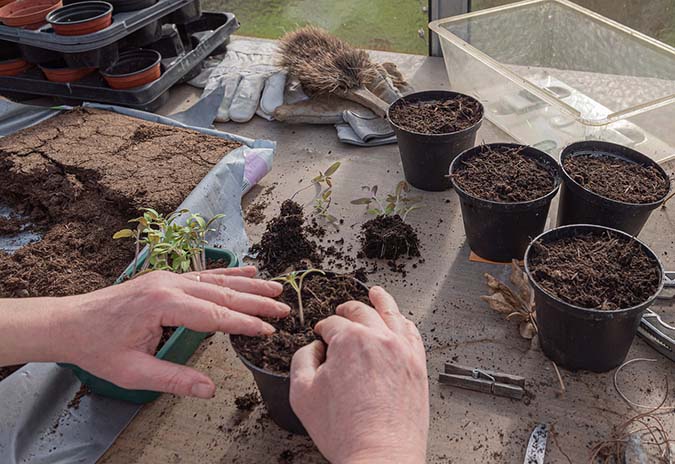
Image by Andreas Göllner from Pixabay
When it comes to the container you use to start seeds, the type of container is not important. I like the manufactured seed-starting flats. They are cheap, reusable, and recyclable. They drain well, and everything is contained in a well-fitted tray. If you don’t have these or don’t want them, use any well-drained container that you like.
- Fill the seed cells almost to the top with your starting mix.
- In order to avoid tearing the young roots when you remove the seedlings from the container for transplanting, it is a good idea to tamp down the germinating mix in the cells now.
- After tamping, add chemical-free water to thoroughly moisten the starting mix. If you really want to be nice, use liquid or dry seaweed according to the instructions on the label. Seaweed is a great item to have on the shelf and it keeps indefinitely.
- When the starting mix is moist, you can plant your seeds at the depth specified on the seed packet.
- When the seeds have been planted, spray the top of the cells with water until the mix is well settled.
- After seeding, you can cover the cells with plastic. You can buy fitted plastic covers for seed starting trays, or just use some plastic wrap or a plastic bag.
When You Start Seeds, Control the Light
Now, here is where the rubber meets the road: Light! You need a strong, reliable light source. You can compromise on many other aspects of gardening, but don’t cheat your green babies on the one thing they need most.
If you have a greenhouse, choose the brightest spot for your new seedlings. If you’ve been setting your seed trays on a windowsill, re-evaluate that choice. Remember: weak light = weak seedlings. If you want husky, healthy seedlings, don’t gamble on the fickle winter sun filtered through a window.
Control the light, and you control the outcome!
Setting up a grow light today is easy and inexpensive, and it doesn’t take up much room. Bulky shop lights and fiendishly hot tungsten bulbs are fading into history. If you have some empty space on a bookshelf or an empty shelf in a kitchen cabinet, you can easily install a couple of tiny T-5 light fixtures. There are also several LED offerings on the market. LED grow lights are powerful and super efficient, and they generate very little heat.
You May Also Enjoy:
“Planting Fruit Trees in Fall: 11 Tips for Success”
Simply attach a light or two to the bottom of one shelf to light the shelf underneath it where your tray will sit. If the shelf is adjustable, you are all set. If not, the tray can be elevated when the seedlings are started, to bring the surface of the soil within two or three inches of the light. That’s right! The light will be very close to the seeds.
If you have room to start seeds on a countertop or a table, there are several tabletop light stands that are designed for the space. The typical design is a simple metal stand that holds the light, suspended by an adjustable string or chain. Tabletop lights are small and easy to use, and they are available in a range of sizes.
The next size up is the shelf model. These resemble a regular set of utility shelves, with a grow light suspended from the bottom of every shelf. These lights offer enough space and power to grow starts for the whole neighborhood! These shelf units aren’t cheap, but they are very useful. In addition to starting seeds they can be used to overwinter plants indoors, and even to grow summer veggies and herbs all winter long.
Consider the Time
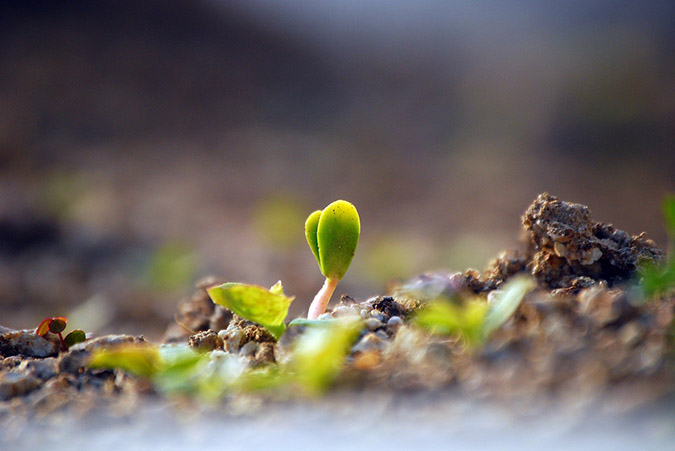
Image by peter jung from Pixabay
Now that you are in control of the light, there is one more important factor to consider: time. You need to transition the plants at the right times on their journey to the outdoor garden. Calculate the correct amount of time various plants need to develop to the optimum transplanting size to avoid holding the plants for extended periods. Begin your seeds based on that timetable.
When your seeds germinate, you will see cotyledons. They should be bright green and fleshy, standing on short stems. Now is a good time to remove the plastic covering, if there is any. At this earliest stage you should water the seedlings with a spray bottle, to avoid damaging the delicate young roots. Ideally, you will not need to water, but if the air is dry, the soil may require additional moisture.
Soon the tiny plants will develop their first true leaves. This is a great time for their first feeding.
Wait until the surface of the soil begins to dry out. Use a mild, natural fertilizer mixed at half strength. Fertilize every two weeks until the plants move outside.
Transplant Carefully
As the seedlings get larger, adjust the height of the light to keep it at least two inches from the top of the tallest plant, allowing for continued growth. When the root system begins to fill the cell, it is time to move up to a four-inch pot. If you transplant too soon, the seedling can break away from the germination mix, causing the roots to tear. If you wait too long, the roots can become bound and constricted in the cell, restricting optimal growth.
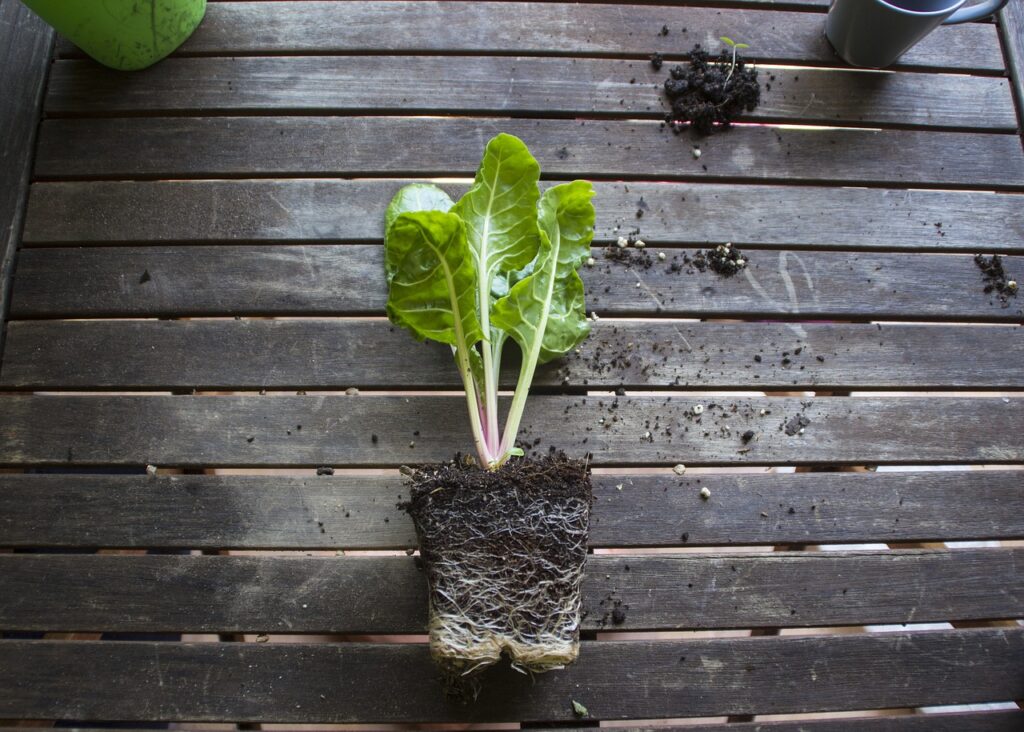
Image by MetsikGarden from Pixabay
Wait to transplant until the soil is neither too wet nor too dry.
Now is the time when the tamping you did at the beginning is going to pay off. If the transplants are reluctant to pop out of their cells, you can give them a little push from the bottom drain hole using the eraser end of a pencil. If you are pricking out, you should transplant much sooner because a smaller root system is easier to remove intact.
Use potting soil as the growing medium for the four-inch pots, or just add a little perlite to the leftover germination mix. Remember the rule we discussed above: Garden soil belongs in the ground, not in containers.
You May Also Enjoy:
“Planting by the Moon: 7 Tips for Success”
“21 Clever Ways to Extend the Growing Season”
“DIY Hoop House: The Easy Greenhouse Alternative”
“Top 5 Things to Consider When Building (or Buying) a Greenhouse”
After transplanting from the seed cells to the four-inch pots, give the plants a good drench of seaweed. You will still need to raise the lights periodically as the plants get taller. When the plants begin to fill the four-inch pots, you need to decide when they are ready to harden off.
In the case of very cold-sensitive plants like tomatoes, sometimes the weather will not permit you to begin hardening off even though the plant is outgrowing its four-inch pot. You can transplant forward again into a quart-sized pot to buy some more time. It is better to move the plants into a bigger pot than to let the roots become pot bound.
I find that potting forward to larger containers is easier than protecting young outdoor plants from late spring cold snaps.
When you decide it is time to begin hardening off, move the plants outside to a protected area and allow them to begin adapting to the outdoors. Filtered light is good for a day or so, but then don’t hesitate to move them out into the sun. These will be tough little rascals and they will transition to the garden well.
Following these simple steps will get you some of the strongest seedlings you have ever grown, and your spring garden will thrive as a result. After a few rounds of success, you will look at your seed catalogs through new eyes, confident that you can start any seed you want!
What Do You Think?
What other tips do you have for those looking to start seeds successfully? Let us know in the comments below!
________________
This is an updated version of an article that was originally published on January 29, 2015.
The Grow Network is a participant in the Amazon Services LLC Associates Program, an affiliate program designed to provide a means for our team to earn fees for recommending our favorite products! We may earn a small commission, at no additional cost to you, should you purchase an item after clicking one of our links. Thanks for supporting TGN!

The Grow Network is a global network of people who produce their own food and medicine. We’re the coolest bunch of backyard researchers on Earth! We’re constantly sharing, discovering, and working together to test new paths for sustainable living—while reconnecting with the “old ways” that are slipping away in our modern world. We value soil, water, sunlight, simplicity, sustainability, usefulness, and freedom. We strive to produce, prepare, and preserve our own food and medicine, and we hope you do, too!


COMMENTS(26)
Thank you so much, this has been very helpful. I’m just starting out and my seedlings are all white and leggy like you describe…now I know why! Thanks!
Hi Jonathan, I’ve done that so many times! LOL
You know antother thing I keep learning over and over again? You can’t start lettuce seeds in August in Texas 🙂 Seriously, it’s way to hot and the seeds never germinate – but I love lettuce so much and I am so excited for the fall. It’s not a problem this time of yer though.
Another tip for sturdier plants is to simulate wind by turning a fan on the seedlings for a short time twice a day. This should help strengthen their stems.
It is also important to be familiar with the germination requirements of the seed you are attempting to cultivate. For example, although usually directly sown, carrots require at least two weeks to germinate. Many chile peppers such as the habenero, will not germinate unless their temperature requirements are met, no matter how viable the seed. For best results, this usually requires a specialty heating mat to maintain the 75-80 F. necessary. They are thermostatically controlled and usually come with a rack to keep the germination flats elevated. I have found one to be a worthwhile investment, if necessary for what you wish to grow. They should last for many years of use. Good seed is not inexpensive and lost time and crops can be frustrating trying to come up with homemade solutions that may or may not work.
I have been able to give leggy seedlings, particularly tomatoes, a second chance by carefully re-potting them in deeper containers. I will bury them in dirt up to the first set of leaves or even a little deeper. The part of the stem under the dirt will eventually turn into roots, providing nourishment and making the whole plant stronger. Of course,at that point I do need to increase the light source if I don’t want to be repeating the process.
My secret to tomatoes, which I grow in containers, is to buy bedding plants when they are little and pot them in small pots. As soon as they are 6 to 8 inches tall, I repot them, but I strip the leaves right up to the top cluster of leaves and plant roots and stripped stem in the earth in the big pots. I always get lovely strong stems that way. I was told this many years ago by a lovely elderly Scot whom I met in the garden shop when I was buying the bedding plants.
Ms. Parsons,
I notice you said, “their thin stems have trouble holding up in the wind”
Some background…My friend and his wife had a commercial greenhouse set up…At one point I used my engineering background to help them build a 17 foot by 76 foot store bought hoop house..I helped them lay it out so the dimensions worked out…(Squareness, plumbnes of the vertical portions, and proper distances… I even made jigs for this..) And they shared their knowledge of the how to’s of growing plants…
I noticed that they always had some oscillating fans set up at strategic locations through out to solve this problem of weak stems…Nothing of hurricane force of course…More like a gentle breeze..
Like Kevin says, it helps acclimate your plants before you send them out into the wild…:)
You can also brush your hand across the tops of the seedlings as you walk by.
I have a comment about two things: temperature and location. Temp: I agree with Michael Machnica whole heartily about temperature and germination success. Find a nice sized box, add rope lights inside, find a kitchen cooling grate or piece of wire shelf that fits in the box, set the grate/shelf on plastic cups and put your seed pots on the grate. You’d be amazed how seeds respond to warmth… just don’t overdo the temp…. lightbulbs tend to be uneven heat sources! Michael mentioned, adjust the temp between 75 – 83 degrees. Location: oh I learned the hard way that damping off disease and garages are synonymous. Stale, cool air is a killer for seedlings. I agree that a breeze will harden the stems.. and fight off disease… but, this has the potential to take moisture from the leave/medium so set the fan apart… not direct.
I didn’t realize how important it was to start out your seed planting experience by avoiding weak seedlings. I appreciate you shedding light on this since it can be discouraging if you are doing other care and maintenance things as you should be to help your plants grow but you aren’t seeing results. It’s important to do some investigation online to see what seed packets are available. From there, you should pick the packets that of higher quality, even if they cost a bit more, so that you can be successful in the long run.
Absolutely, Bernard!! Happy planting!! 🙂
Great post! It gave me several ideas that I will surely put into practice. Thank you!
The most important factors to me is the climate and soil. If a certain type of vegetable grows
great in my location, I try to collect the seeds from that strain only , prevent cross , marking the seeds as type and time collected. That way I always have fresh seeds on hand , save time and money.
I wish I had discovered this site years ago. Some years my garden was amazing, some not so much. I started my seeds every year, only buying from growers when my plants failed, or something new came up and I just had to try it, ghost peppers! Now I will take my new knowledge with me to Ecuador. Yes, growing parameters will be different…..and local medicines also, however, closer to thier roots since the local natives are still practising thier ancesters ways. Wish me luck!
I’ve just retired from supervising “humans”, and thanks to the prodding from my sister, will try supervising baby plants now lol. She is bugging me to start my seeds now in South Georgia and sent me your link. My wife and I are beginner preppers on 4 acres, and hope to learn good gardening and other skills to enable us to be self sufficient before North Korea hits us with an EMP. Thanks in advance for all your free info. Now, it’s time to go look for those seed starter kits lol….;>)
Great article , good advise. Thank you !!!
Protect your plants with pepper: Did you know that ants aren’t the only pests that hate pepper? Many other garden insects and wildlife pests do too. Ensure that they never bother your garden again by combining black pepper with equal parts flour and surrounding your plants with the mixture.
To post a question to the prickly cactus expert (Doug), what do I do? The email says others have but I don’t see where. I have a 22-year open wound from having been bitten by hundreds (or more) of brown recluse spiders that lived behind my bed. I thought it was a rash. The wound is the size of a quarter and does not close. I put a comfrey tea bag dipped in water and sprayed with an herbal remedy on it, twice a day, and maybe it is diminishing. (I am healthy, have a great immune system, eat healthfully, and have no other ailments.)
Hi Emily, About 3 yrs ago my son had a place on his arm that grew into a really ugly wound, we had no idea what it could be, well it grew & grew. We treated it with many different natural remedies, along with Stem cell Nutrition we used Aloe fresh fillet, & pure lavender oil, I wrapped the aloe on the wound with vet tape from any feed store. It took months & months to finally heal…I have photos of the progress if you are interested, today he has only a white spot on the arm & no hair….Good luck
Just to shed some light on the issue of artificial lighting for seedlings:
(1) use fluorescent or LED lights, not incandescent bulbs (too hot)
(2) place the lights 3-4 inches above the plants, and adjust height as needed as plants grow
(3) seedlings prefer light in the “blue” light spectrum. For fluorescent lights that means 6000-6500 Kelvin (K) bulbs.
I like the soil mix and plan to try it with my next seeds.
Thanks for the information. I learned a few new things!
Thanks for the tip on grow lights. I have the HOT bulky shop lights with grow bulbs. I will switch to LED. But, how many hours a day do you leave the lights on the seedlings? 4, 8, 10,12?
I will have to try your method of keeping the grow light close to the plant. Do you keep the grow light on 24 hours a day or shut it off at night?
I run my lights on a timer for 16 hours a day with excellent results. Happy planting!
I did a comparison of planting in peat pots and regular pots this year and the peat potted plants didn’t perform nearly as well as the others. I have no idea what the difference is but all other factors were identical.