There’s no need to break the bank for store-bought when you can DIY probiotics using these simple, inexpensive (and tasty!) recipes.
There are some recent questions about whether prepackaged probiotics are truly effective, but scientific studies still point to the health benefits of the probiotics in certain fermented foods. And while the prepackaged probiotic capsules and tablets in health food stores can be pricey, there’s no need to break the bank for expensive (and potentially ineffective) products when you can make your own probiotics at home for pennies on the dollar.
Just be aware that when it comes to ferments, the names people use can get a little murky.
DIY Probiotic #1: Sauerkraut
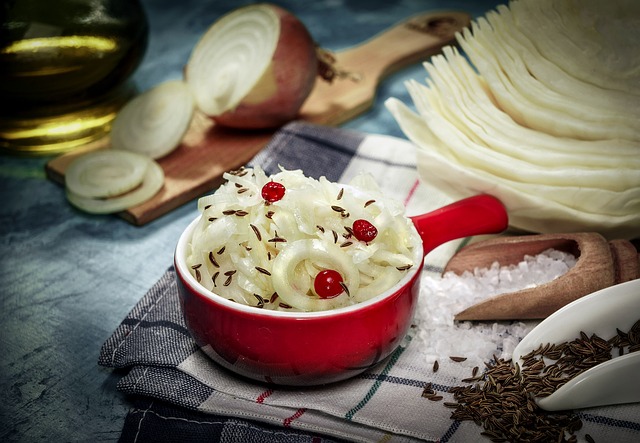
Image by Vasilijus Bortnikas from Pixabay
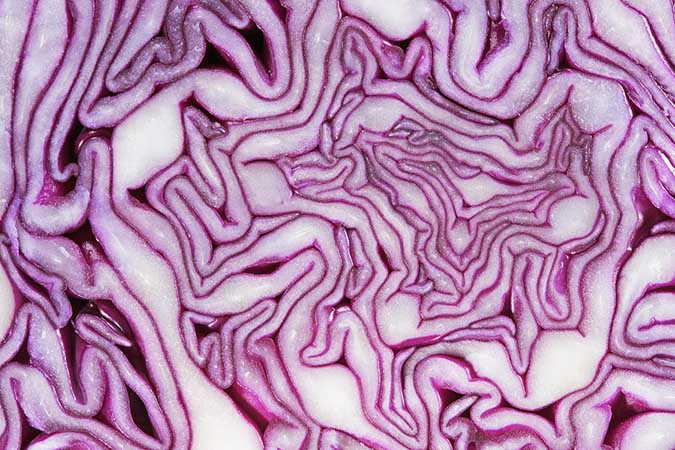
Got cabbage? You’re probably familiar with this one already, but it’s such an excellent source of probiotics that it deserves our top spot. Even if you’re not growing your own, cabbage is dirt cheap to buy. The Environmental Working Group lists commercially grown cabbage as being low in pesticides (#4 on the “Clean 15” list), so there’s really no excuse. And yes, you can easily make sauerkraut in as little as 5 days, without using salt, and using repurposed mason jars.
Of course, you can get all fancy and use a pickling crock; add in mint, dill, ginger, and other herbs and spices; add in a package or 2 of pricey starter culture; and let the ‘kraut ferment for up to 2 months. If you’re interested in a more complex sauerkraut, see this article: “Make the Perfect Home-Fermented Sauerkraut – It’s All in the Temperature.”
Here’s that simple, cheap, DIY recipe you can do right away (feel free to double or triple the recipe):
Salt-less Sauerkraut Recipe
1-2 heads cabbage
2-3 c. spring water, for consistency
Quart-sized wide-mouth mason jars (2 jars per head of cabbage)Make sure surfaces, equipment, and tools are very clean (wash with food-grade hydrogen peroxide or spray with vinegar, then rinse). Remove outer leaves from cabbage and set aside. Shred cabbage using food processor. Place half the shredded cabbage in a bowl. Take the other half of the shredded cabbage and puree with enough water to a make a thick slurry in the food processor (this might take a few batches). Pour pureed cabbage over shredded cabbage and mix to cover. Take this mixture and pack tightly into clean, 1-quart, wide-mouth mason jars, pushing down on the mixture with your fist to pack it in as much as you can. Leave a 1-inch space at the top. Roll a cabbage leaf into a cigar shape. Place on top of the sauerkraut (squeeze leaf in or cut to fit as needed). Repeat and stuff in 1-2 more leaves, then place lid and screw cap on. The goal is to use the cabbage leaves—which are wedged between the sauerkraut and lid—to keep the ‘kraut under the water.
Repeat this process with the rest of the jars. Depending on the size of your cabbage, you should expect to use two 1-quart mason jars for every head of cabbage. Place jars on a plate, as they may leak out. Let ferment for 5-7 days. You can taste test after 5 days, or let it ferment for longer. (Some people ferment their sauerkraut for 5 days, some for 2 weeks, and others for up to 2 months.) Discard (compost) the rolled cabbage leaves and store the ‘kraut in the fridge, where it will continue to ferment but at a much slower pace due to the cold temperature. Eat 1-2 tablespoons—up to 1/4 cup per day—with lunch or dinner.
Notes: 1) Fermentation time depends on heat and humidity. During warmer months, the fermentation process is much faster. 2) If you hear noises coming from the jars, it means there’s gas buildup. You can open the jars to release the gas, then tighten the lids again. 3) You can use green, red, savoy, bok choy, etc., or any combination of different sorts of cabbage.
DIY Probiotic #2: Fermented Veggies
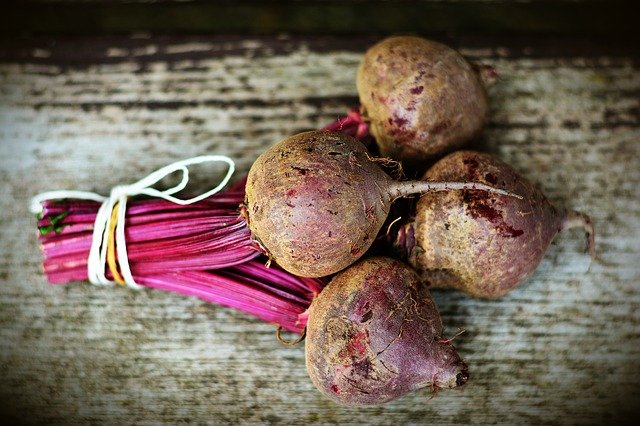
Image by congerdesign from Pixabay
Got more cabbage? And root veggies? With fermented veggies, you’re doing the exact same thing you did with the cabbage in the sauerkraut, only now you’re using root veggies. When cabbage and root veggies are used together, people call it either sauerkraut or fermented veggies. It’s really just a game of semantics!
Carrots and beets tend to be the root veggies most commonly used in recipes, but don’t shy away from adding in parsnips, turnips, radishes, rutabagas, and even the roots of wild edibles like burdock, dandelion, wild carrot, and creeping bellflower.
You can add in cabbage, use salt (or use the method as in #1 with pureeing half the veggies with water as the brine), add in herbs and spices, and even throw in a package or 2 of starter culture.
Here’s a simple recipe you can use to get started right away with this idea, using lovely apples to boot:
Gingery Apple Parsnip Salt-less ‘Kraut Recipe
1 head cabbage
1 thumb-sized piece ginger, peeled
1-2 parsnips, peeled
2 large apples, peeled and cored
2-3 c. spring water
2 quart-sized, wide-mouth mason jarsRemove outer leaves of cabbage and set aside. Shred cabbage, ginger, and parsnips in a food processor. Place in a bowl. Puree the apples with 2-3 cups water in a blender until smooth. Pour over veggies and use hands to press veggies down until completely covered by liquid. Pack veggies tightly into two 1-quart mason jars, leaving a 1-inch space at the top. Roll a cabbage leaf into a cigar shape. Place on top of veggies. Repeat and stuff in 1-2 more leaves, then place lid and screw cap on. Set jars on a plate, as they may leak out. Let ferment for 5-7 days. Compost the rolled cabbage leaves on top, remove any mold that may have formed, and store in the fridge. Eat 1-2 tablespoons or up to 1/4 cup daily with meals.
Variations: 1) Replace parsnip with 1-2 carrots or 1-2 beets. 2) Replace cabbage with 3-4 carrots plus 2-3 beets. 3) Feel free to omit the ginger if you like, and add in your favorite herbs and spices.
DIY Probiotic #3: Cabbage Rejuvelac
Got cabbage? Again?! Cabbage rejuvelac is an oh-so-easy recipe to get in your probiotics. It’s much easier to make than the traditional way of making salted sauerkraut (no pounding, grunting, or salt require). You take cabbage, blend it with water, let it ferment, strain out the cabbage, then drink the liquid. You can add this liquid to smoothies or even pair it with oil and herbs/spices to make salad dressings. And did I mention that you can also do this with beets, carrots, and other root veggies—just like you would with #2 above, but so much simpler? I also should mention that this ferment goes by other names, like Cabbage Kefir.
You May Also Enjoy:
“Growing Cole Crops—Broccoli, Cabbage, Cauliflower, and More”
“5 Homestead Probiotics You Can Make at Home!”
“How to Make Unlimited Bread With That Last 1/2 Packet of Yeast”
Here’s that easy-peasy recipe to get you going:
Cabbage Rejuvelac (or Cabbage Kefir) Recipe
3 c. chopped or shredded cabbage
1 c. spring water
1 quart-sized, wide-mouth mason jarPuree cabbage in a blender. Pour into a 1-quart, wide-mouth mason jar. Cover top of jar with a paper towel or dish towel and secure with a rubber band. Let sit for 3 days. Scoop off any mold that has formed on top. Pour mixture through a nut milk bag. Drink or use in recipes. Will keep for a few days in the fridge. Use 1-1/2 cups of this liquid to start your next batch of cabbage rejuvelac. Subsequent batches of cabbage rejuvelac will be more potent in probiotics.
DIY Probiotic #4: Rejuvelac
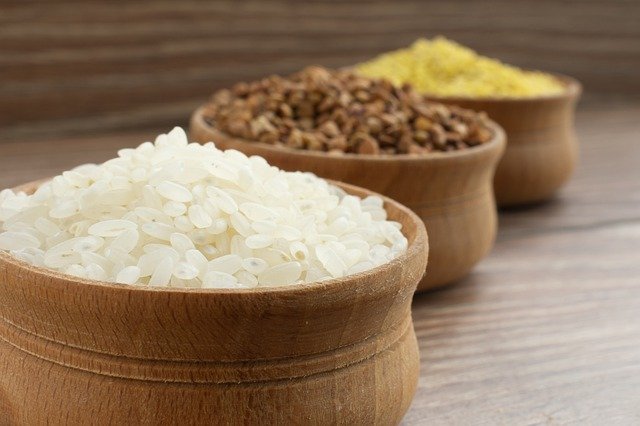
Here we go again?! Nope, not cabbage or veggies this time around, but grains. Usually, wheat is first sprouted and then water is added to the grains and left to ferment. The liquid is strained out and used as a drink or in recipes, as in #3. Since gluten intolerance is rather rampant nowadays, rejuvelac has seemingly fallen out of vogue. Yet rejuvelac can easily be made with gluten-free grains like quinoa and millet.
Hulled millet is fairly inexpensive and doesn’t sprout as other grains do. All the better and quicker for making a simple and easy gluten-free rejuvelac teeming with probiotics.
Dare I mention that this ferment also goes by other names, such as Sprouted Grain Kefir? Nah, let’s get to the recipe:
Millet Rejuvelac Recipe
Place 1/2 cup hulled millet in a 1-quart mason jar and let soak overnight. Drain and rinse well. Add water to the top of the mason jar. Place a dish towel or paper towel to cover the top and secure it with an elastic band. Let sit 2-4 days. Taste test on each day to see if it’s to your liking (it gets more sour the longer it ferments). Strain out the liquid using a sieve or nut milk bag. This liquid is the rejuvelac. Drink on up! You can use this in smoothies instead of milk or water, or pair it with oil to make salad dressings. Use 1/3 to 1/2 cup of this rejuvelac to start your next batch of rejuvelac.
Variation: You can use the above method with quinoa. You might even notice that the quinoa already has “tails” (has sprouted) after soaking for 8 hours. Quinoa is high in saponins, so make sure you rinse well.
DIY Probiotic #5: Milk (Dairy) Kefir
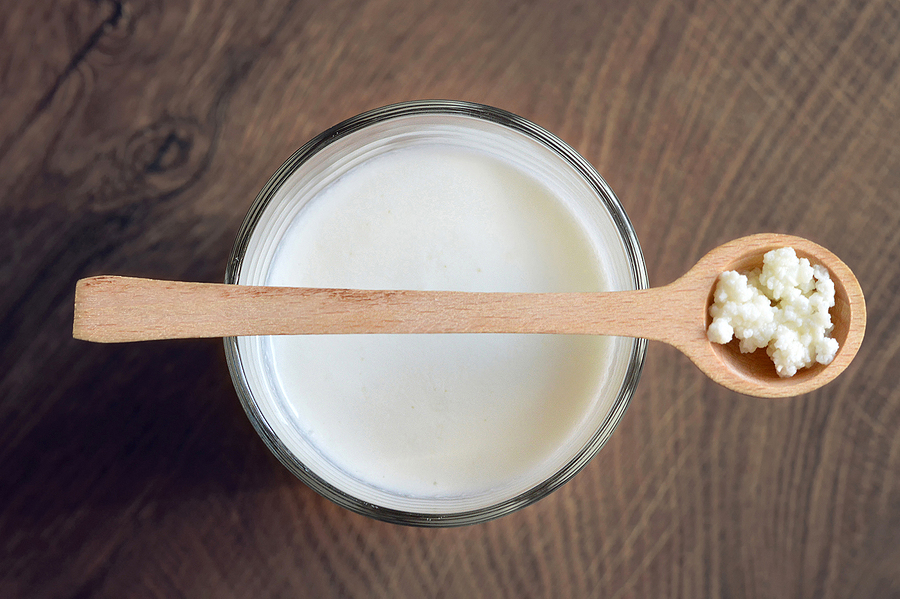
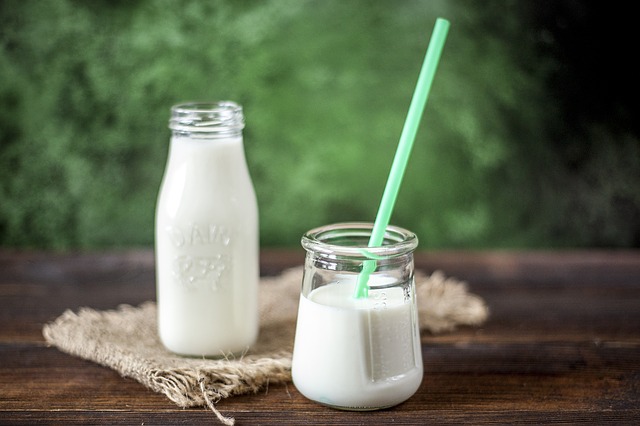
Even though there’s plenty of confusion around the different names used for ferments, this one is fairly straightforward. In this case, we’re talking about the traditional process of incorporating cow, goat, or sheep milk with kefir grains. Kefir grains are really strands of Streptococci bacteria (i.e., Streptoccocus thermophilus), Lactobacilli bacteria (i.e., Lactobacillus acidophilus, L. casei, L. paracasei, and L. brevis), and various kinds of yeasts. They are often referred to as yeast or bacterial starters. The bacteria use the lactose sugar in the milk to survive and thrive.
It’s especially easy to make your own. You can purchase a package of powdered starter, buy kefir grains online (they have different strains of bacteria than the ones sold in powdered form), or even get some starter from someone you know. It only takes 24 hours to culture. Once you have your first batch of kefir done, you can then use that as a starter and continually have a fresh supply of kefir on hand. You can expect to be drinking between 30-50 healthy probiotics—no excuses as to why we shouldn’t all be drinking probiotic-rich kefir every day!
Basic Milk Kefir Recipe
4 c. organic milk—whole, part, or skimmed
1 package milk kefir starter
1 quart-sized mason jarPlace milk starter in a clean 1-quart mason jar. Gently warm the milk in a ceramic, glass, or stainless steel pot on the stove until finger hot. Pour the milk into the jar. Stir to dissolve the powder with the handle of a clean, wooden spoon. Cover with a dish cloth or paper towel, secure with an elastic band, and let sit in a warm area of your kitchen (70-75°F) for 24 hours. (Colder temperatures mean it will take longer for your milk to culture, while warmer temperatures mean it will take less time.) After 24 hours, the kefir will have the consistency of buttermilk, or a thin, runny yogurt. It’s ready to drink! Add kefir to smoothies or use to make creamy salad dressings like ranch and dill.
Notes: 1) If you are making kefir with kefir grains (not the powdered starter), you’ll have to strain out the grains using a plastic (not metal) fine mesh sieve before consuming the liquid. 2) To make a fresh batch of kefir, place 1 cup of kefir in a 1-quart mason jar to use as your starter. Gently warm 3 cups milk and pour over the starter. Stir to combine with the handle of a wooden spoon. Cover with a dish cloth or paper towel, secure with an elastic band, and let sit in a warm place in your kitchen. Done in 24 hours!
DIY Probiotic #6: Non-Dairy Kefir
Oh no, not again! But this time without the milk?! Are there even kefir grains used?! Yes, the word “kefir” has now been stretched to reflect the trend of fermenting nut, seed, grain, and coconut milks with kefir grains. And yes, because there is no lactose sugar in these types of milks, the bacterial strains used to ferment them may be somewhat different than the ones used for dairy kefirs. For example, some use the same transparent grains to ferment water kefir (see below), while others use specific strains of probiotics like Body Ecology’s Kefir Starter. Bacterial strains that you’ll find in this type of ferment can include Lactobacillus casei, L. plantarum, and L. cremoris, along with the yeast Saccharomyces boulardii. Note that sometimes inulin (a prebiotic) can be added to kefir grains to help feed the bacterial strains—that is, the probiotics.
You May Also Enjoy:
“15 Natural Antibiotic Alternatives”
While you can purchase the kefir grains online (some health food stores may carry them—look for the word “vegan” on the packaging), it’s best to make your own non-dairy milk rather than buying the ones that contain carrageenan, guar gum, and other unsavory ingredients. Note that in comparison to dairy kefir, non-dairy kefir is quite watery—all the better to use in smoothies, to dilute juices, to make cold soups like gazpacho, or to drink as is!
Basic Non-Dairy Kefir Recipe
1 liter non-dairy milk (sunflower, hemp, walnut, almond, sesame, coconut, etc.—recipe provided below)
6 Tbsp. kefir grains
1 tsp. date paste (optional—recipe provided below)
1 quart-sized mason jarAs with dairy kefir, place grains in a mason jar. Warm the non-dairy milk until finger hot (when you stick your clean finger in, there is no difference in temperature). Pour the non-dairy milk into the jar and stir with a non-metallic object. Place on the lid and screw cap on loosely. Leave to ferment in a warm area of your kitchen for 24-48 hours. As with other ferments, humidity and heat will affect the ferment time. Pour non-dairy milk through a non-metallic sieve, or use a nut milk bag. You can reuse the kefir grains to make up to 5-6 more batches of kefir.
Variation: The following technique may be helpful to extend the shelf life of your kefir grains’ potency indefinitely: after straining out the kefir grains, place the grains in 1-liter finger-hot dairy milk + 1 tsp. date paste. Let sit 24 hours, then strain out the kefir grains. (If someone is OK with dairy kefir, give them this liquid to drink!) Now use the grains to make your non-dairy kefir as in the recipe above. Repeat this process of letting the grains sit in dairy milk (in other words, making a dairy kefir) once a week. (If you are very sensitive to dairy, do not use this technique.)
Basic Non-Dairy Milk Recipe
1 c. nuts or seeds
2 c. spring waterIf you wish, you may soak your nuts/seeds for 4-8 hours, then strain and use. Place nuts/seeds in a high-speed blender with the water and puree. Strain the liquid out using a nut milk bag. Drink or use in recipes.
Variation: For a thicker milk, use 1 cup water and for a thinner milk use 3 cups water. I’d recommend using 1-2 cups water when using to make kefir.
Basic Date Paste Recipe
Organic dates (Medjool, honey, etc)
Water to coverPlace dates in a bowl and cover with water. Let soak 4-8 hours until soft. Place dates (remove any pits first) in a food processor and add in enough of the soak water to make a thick paste. Use in recipes where you want a sweet taste. Store in a mason jar in the fridge.
DIY Probiotic #7: Water Kefir
Seriously? I bet there are no milk or kefir grains used, are there?! Well, yes and no. There are two methods used to make water kefir, you see.
In the first, water is used as the liquid, and the “kefir grains” are really sugar plus fresh and/or dried fruits that are allowed to ferment in the water. I should mention that this is also sometimes called kvass (see below).
You May Also Enjoy:
“How to Make Homemade Yogurt: Easy, Inexpensive, and the Healthiest You’ll Ever Eat”
In the second method, water is used as the liquid, and sugar is paired with the same kefir grains used to make non-dairy kefir (as above). After this first ferment, the strained liquid is then made to ferment again with dried fruits, fresh fruits, fruit juices, and herbs and spices. Bacteria and yeasts are present, and might include Lactobacillus acidophilus, L. brevis, and L. bulgaricus, as well as the yeasts Saccharomyces boulardii and S. cerevisiae.
Even if you’re using zero kefir grains to make a beneficial brew of bacteria, the principle of what a kefir is still holds true: it is a liquid in which a symbiotic relationship of various beneficial bacteria and yeast consume sugar and produce ethanol, carbon dioxide, and lactic acid.
And in case you were wondering, dairy kefir grains create a complex matrix of soluble polysaccharides/complex sugars (another way of saying that is “mucous”), while non-dairy/water kefir grains are a matrix of insoluble complex sugars (which is why this kefir is much more watery than the dairy version).
There are many sites online where you can buy water kefir grains, and there are just as many recipes around. If you’re looking to add flavor to water kefir, the general rules are:
- Fruit Juice: Add 1/2 cup fruit juice for every 4 cups water kefir—use right away or refrigerate.
- Fresh Fruit: Add 1-2 chopped fresh fruits to every 4 cups water kefir and let sit 1-2 days, then strain.
- Dried Fruit: Add a handful of dried fruit to every 4 cups water kefir and let sit 3-7 days, then strain.
If you’d like to add fizz to your ferment, then instead of using a mason jar, use a tightly capped bottle that doesn’t allow oxygen in. Just be sure you “burp” (open) the bottle once a day to prevent gas buildup from bursting your bottle. And be careful when opening the bottle—contents are under pressure!
Dare I mention that these fizzy water kefir drinks are sometimes referred to as fizzy sodas? Right, so here’s that basic recipe:
Basic Water Kefir Recipe
1 pkg. or 3 Tbsp. water kefir grains
1/4 c. organic sugar
4 c. spring water
1/4 tsp. ConcenTrace minerals or unsulphured blackstrap molasses* (recommended, but optional)Place sugar in a mason jar. Warm the water gently in a glass, ceramic, or stainless steel pot. Add to mason jar and stir to dissolve with a non-metallic object. Add in the kefir grains. Cover with a dish cloth or paper towel and secure with an elastic band. Let sit for 24-48 hours in a warm spot in your kitchen. Strain out the kefir grains using a non-metallic sieve. You can now reuse your kefir grains, and your kefir is now ready to be consumed, refrigerated, or fermented a second time with fruits to add flavor.
Note: Water kefir tends to ferment better when minerals are present. Blackstrap molasses yields a particularly strong taste that some don’t mind, while others do.
Variation: Easily flavor this basic recipe by adding in 1/2 cup of your favorite juice. Keep remainders refrigerated.
Here’s an interesting wild recipe that you can try on for size:
Stinging Nettle Vitamin C Enhancer Recipe
4 c. stinging nettle infusion or 4 cups water + 1/4 tsp. ConcenTrace minerals
3 Tbsp. water kefir grains
1/4 c. sucanat or organic sugar
1 Tbsp. each dried rosehip, elderberry, and goji berry
Peel from 1 orange and 1 lemon
1 Tbsp. each orange and lemon juice (optional, but oh-so yummy)Make your water kefir first: warm nettle infusion (or water + minerals) in a glass, ceramic, or stainless steel pot. Place sugar in a mason jar and pour in warm tea/water. Stir with the handle of a wooden spoon or other non-metallic object to dissolve. Add in kefir grains. Place a paper towel or dish cloth on top, secure with an elastic band, and let sit 24-48 hours. Strain out kefir grains using a plastic sieve. (You can now use the grains to make another batch of kefir.)
Pour the kefir into a mason jar or bottle with the dried fruits, peels, and juices, if using. Let sit 3-7 days. Taste test on day 3 and then on each day until it is to your liking. You can always add in more orange and/or lemon juice, if desired. Be sure to burp bottles each day to help with gas buildup.
DIY Probiotic #8: Kvass

Image by Анатолий Стафичук from Pixabay
Hold on a minute there, sister. So, one of the methods used to make water kefir produces a liquid called kvass? Yes, although I think kvass is a better classification name to use where fruits or veggies, perhaps sugar or honey, plus water are fermented and no kefir grains are used. Perhaps we could call it fermented fruit or fermented tea? Perhaps not.
Let me muddy the waters further by pointing out that you can find different traditional ways to make kvass. The first is to ferment grains or bread (usually rye) with fruits, perhaps with a sweetener and a pinch of spice. The second way is to use beets, and the method to make it is similar to the beet rejuvelac or beet kefir mentioned above. Now, don’t roll your eyes—let’s put all the name calling aside!
You May Also Enjoy: “12 Uses for Rose Petals—From the Kitchen to the Boudoir”
While kvass may be much less popularly known than kombucha (see below), it’s a breeze to make. Some people don’t use sugar at all, some use honey instead, some are keen on using fresh fruits, and some enjoy using edible flowers and herbs. Children seem to really enjoy the sweet version of using fresh fruits, perhaps with a touch of honey.
Here’s the basic way to make beet kvass using salt, followed by a recipe for a wild-fermented fruity “tea” kvass:
Basic Beet Kvass Recipe
2 beets
1-2 tsp. sea salt
4 c. spring water
1 quart-sized mason jarTrim beet ends. No need to peel—simply wash and then dice beet. Place beet, salt, and water in a clean mason jar. Put on lid and screw cap and place on a plate. Let ferment for 3-7 days. Taste test on day 3 and each day thereafter to see if it’s to your liking. Scoop off any mold that forms. Strain out beets using a non-metallic sieve. You can drink the liquid (kvass) right away or refrigerate it first and consume after a few days (some say the taste mellows out). Drink 3-4 ounces per day.
Note: Do open the jar every day to prevent gas buildup, which can warp the lid.
Variations: 1) Use 3-3/4 cups water + 1/4 cup cabbage or other veggie rejuvelac (see recipe above) as your starter. 2) You can use 1/4 cup of any ‘kraut brine recipe. Use 1 teaspoon salt. Let ferment 2-3 days, then strain out liquid. Drink and refrigerate leftovers.
Apple and Rose Petal Kvass Recipe
1-2 small apples, cored and diced
1 handful dried rose petals
2 c. spring water
1-2 Tbsp. honey (optional)
1 pint-sized mason jarPlace all ingredients in a pint mason jar. Place on lid and screw cap. Shake a few times a day. Done in 2-3 days, when apples look “cooked” or there are bubbles on the top. Strain out the liquid and compost the fruit and petals. Keep refrigerated afterwards. Drink 3-4 ounces per day.
Variations: 1) Replace apples with a handful of fresh cranberries, raspberries, or blueberries. Dried fruit works fine, too. 2) Replace rose petals with dried chrysanthemum flowers.
Notes: 1) Push down on lid to test for amount of carbon dioxide buildup. If it doesn’t pop up or push down, open lid to release gas, then screw lid back on. Do this 1-2 times each day. 2) Some people find that the honey makes for a better ferment, while others find it too sweet and prefer it without—almost like a fermented tea.
DIY Probiotic #9: Kombucha
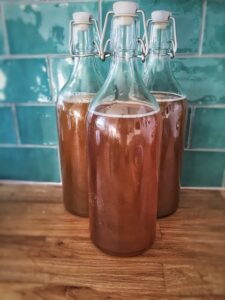
Image by Melanie Rodriguez from Pixabay
Speaking of fermented teas: in kombucha, black or green tea is first fermented with a Symbiotic Colony Of Bacteria and Yeast called a SCOBY—also called “mother,” “baby,” or “mushroom” (although it’s not a mushroom). Once this initial ferment has been done, various fruits and herbs can be added and the liquid can be allowed to further ferment, offering up a host of tasty flavorings. It’s a fizzy drink and the alcohol content can vary. Usually, the first ferment will yield a brew of about 0.5%. Second ferments, where the naturally occurring sugars in fruit will react with the yeasts, can bump the alcohol content up, so you might be interested in purchasing a hydrometer from your local brewery supply store.
Making your own kombucha is quite cheap, once you have procured your SCOBY. If you know someone who brews kombucha, you can ask them if they might share a baby from their mother SCOBY. Otherwise you can purchase one online for $15-$35, or you might find one cheaper on Craigslist or Kijiji.
Another option is this: since all bottles of kombucha contain SCOBY, you can begin your journey into kombucha-making by buying 1 bottle from the health food store and growing your own SCOBY:
DIY SCOBY Recipe
1 bottle unflavored, raw, unpasteurized, organic kombucha
1 c. black or green tea, with 1 Tbsp. organic sugar dissolvedPlace kombucha and sweetened tea in a mason jar. Cover with a dish cloth or paper towel secured with an elastic band. Let the SCOBY grow for several weeks (how long will depend on heat and humidity—estimate 2-4 weeks). At first, the bacteria will ferment to look like a thin film floating on the top of the surface. It will then grow and be ready to use when it is 1/4 to 1/3 inch thick.
Now that you have your mother, or SCOBY, there are plenty of recipes online that you can find and experiment with. Make sure to share the love with friends and family!
More Ideas to Try
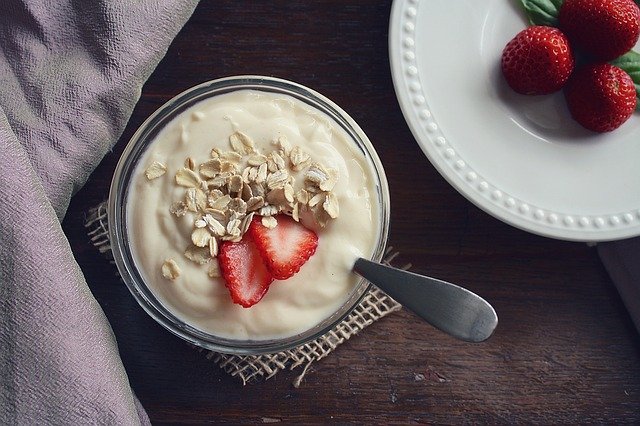
Image by Aline Ponce from Pixabay
There are many fermented foods out there that you can buy or make from recipes you find online, such as:
- Dairy or non-dairy cheeses and yogurts
- The fermented soys of tempeh (tofu fermented with the fungus Rhizopus oligosporus or R. oryzae), miso (soy beans fermented with the fungus Aspergillus oryzae), and natto (soybeans fermented with Baccillus subtilis var. natto)
- Pickled goodies like umeboshi plum, ginger, beets, pickles, and kimchi
- Apple cider vinegar with “mother”
- Raw milk, to which nothing need be added!
The takeaway of this fermented story? In theory, almost any food can be fermented—yes, there are even recipes for making fermented fish!
You May Also Enjoy: “Homemade Apple Cider Vinegar the Easy Way—With 29 Uses”
I’ll leave you with this one last easy-peasy recipe that you can make at night and eat in the morning:
Kefir-Inspired Cinnamon Raisin Oats Recipe
1/2 c. rolled oats (gluten-free if need be)
1/2 c. dairy or non-dairy milk + 1/2 c. dairy, non-dairy, or water kefir
A handful of raisins or 2-3 chopped and pitted Medjool dates
1 Tbsp. ground chia seeds or 1-1/2 Tbsp. whole chia seeds
1/8 to 1/4 tsp. cinnamon (to taste)
1-2 Tbsp. shredded coconut (optional)
Stevia, to sweeten (optional)
1 pint-sized mason jarAdd all ingredients except stevia to a mason jar. Shake jar well, then refrigerate overnight. In the morning, shake jar again. Pour into a bowl and sweeten with stevia, if desired.
Variations: 1) Use 1 cup dairy, non-dairy, or water kefir. You can also use 1 cup dairy or non-dairy milk. 2) For a chocolatey taste, dissolve 1 Tablespoon cacao powder in a bit of hot water. Add to the mason jar with the rest of the ingredients. In the morning, top your oatmeal with 1-2 Tablespoons carob chips, dark chocolate chips, or cacao nibs, if desired.
What Do You Think?
What’s your favorite way to make and eat probiotic-rich foods? Let us know in the comments below!
This is an updated version of an article that was originally published on December 18, 2015. The author may not currently be available to respond to comments, however we encourage our Community members to chime in to share their experiences and answer questions!
The Grow Network is a participant in the Amazon Services LLC Associates Program, an affiliate program designed to provide a means for our team to earn fees for recommending our favorite products! We may earn a small commission, at no additional cost to you, should you purchase an item after clicking one of our links. Thanks for supporting TGN!

Cat Wilson is a holistic health practitioner who loves plants and meditation. When she isn’t working out or writing, you can find her hugging trees and talking to the wild weeds in her garden. Grab a gluten-free recipe or get some help with going vegan or mindfulness at her website or on her YouTube Channel: Cat’s Raw Paw.


COMMENTS(25)
Excellent article! I’ve been experimenting with naturally fermented food gradually and enjoying them, although I wish my family were more willing to partake of my experiments. The one thing I would mention – many ferments are acid/salty enough that using metal caps/rings on your canning jars is not ideal. As much as plastic isn’t my favorite thing either, I buy the plastic canning lids for my fermentation projects. I am watching the Thrift Shops for the glass-lidded jars, but most I’ve seen aren’t large enough for this job.
Also, I was given the rubber stopper with airlock from an old wine kit. I drilled a hole in one of the plastic canning lids the right size to receive the stopper. Now I won’t have to worry about the ferment building up too much pressure in the jar, and still maintain the oxygen-free situation we’re aiming for, because it can bubble away just like the wine I’ve made does.
There are more single celled animals in the human body than human cells! It’s time we stopped fearing the good guys, just because there are some bad ones out there.
Great info, Jay! Thanks so much for sharing your experiences with fermenting! Yes, there are gadgets out there that let you release the gas buildup if you’re doing ferments in a mason jar. For the metal lids, you could always use a piece of parchment paper glued onto the metal lid instead of using plastic. If you do a lot of ferments, I’d recommend going all out and getting a pickling crock. They don’t retain any odor and they come with stone weights. Happy holidays and hope you enjoy the second part of the article with more recipes 🙂
While it requires a bit more attention initially; we discovered the loosening & re-tightening of the lids can be omitted simply by a more slow loosening of the ring. It is possible to reach a state of equilibrium where the pressure generated by CO2 production slightly exceeds the pressure restraint capacity operated by the ring & lid atop the jar. Even as the production rate diminishes, the containment pressure will remain pretty much constant enough to prevent oxygen permeation into the bounty.
I learned this by accident when I assisted in directing a wine grape glean for our local gleaner group. We exhausted our supply of jars and our supply of juice exceeded the desires of the group. The surplus had been decanted into the old 4L wine jugs with aluminum lids. We could observe the generated gas atop the bottles and loosened the lids to prevent a broken jar mess. Gleaner members no longer wanted the fermenting juice so the rest was left beneath our kitchen table
By Christmas, we had some decent wine ready to give as Christmas gifts. I figured that Jesus gave us that opportunity and we enjoyed it immensely. I kinda understood the parable of new wine into new wineskins. When you put fresh grape juice into the bladder or stomach of a sheep or cow, nature happens. Any pastor who tries to tell you that the wine in the old testament was miraculously free of C2H5OH, he is not well educated. You can’t insert fresh grape juice into those kind of containers and not create wine. It also serves to cure the skin as the CO2 is carbonic acid. It cures the flesh of the outside containing vessel.
Softballumpire,
Thanks so much for sharing your experiences! If you use a regular crock pot OR a crock pot for pickling the issue of gas pressure is completely avoided, so this might be something to consider in your next experiments 🙂 Happy Holidays 🙂
Catherine, how would u use a regular crock pot?
I’m pretty new to all this but very interested in using what I have on hand instead of having to go out & spend $
Hi Bek,
I’ve used my good ol’ crock pot, a plate, a brick and a big bowl of water. I put the plate on top of the cabbage leaves, put the brick in the punch bowl then filled it with water. I put the bowl on the plate and it works perfectly to keep the veggies under the brine. While it ferments, you just have to add in some additional water to the bowl to make sure it’s always full. I’d also recommend putting the crock pot on a plate, as there can be some leakage for the first few days. I’d also recommend washing the plate daily to avoid any smells or bugs 🙂
This is how I’ve done it many a-time!
Hope this helps. Feel free to ask any more questions if need be 🙂
Oh, thank you so much! This is what I have been looking for!
Hi Denise,
You’re so very welcome! Stay tuned for the second part of the article, with more ferments and recipes!
This information is so valuable! I had been putting off doing this thinking, I need to buy a good book to explain it so I will really understand! But with the simplicity of these 4 ideas, I can start after my next grocery shopping trip! Thank you for this. I appreciate it so much and will try it out very soon.
I would like to add that everyone needs probiotics. We know we do, but we forget. It should really become part of our lifestyle to keep out gut health as a high proiority. Thanks again!
I agree, great recipe ideas to try.thsts just another thing I’ve put off for way too long. Maybe this might be a winter project.
Great recipes, I cannot wait to try them!
While I am already doing everything on this list, I would like to share my beginning of fermenting. Probably most people start with sauerkraut; I did. I had made a batch about 20 years ago; the old fashioned way; you know, grow or purchase 6 or so heads of cabbage, obtain a huge crock, get salt and get to making sauerkraut. It took a lot of time and management. Needless to say, I didn’t do it again. After making the stuff I had 5 gallons of sauerkraut in a large glass crock….. what to do with it before its all eaten! Well than I discovered Sandor Katz’s book and the quart jar method, and my life was transformed! Now my counter has anywhere from 1 to 10 jars bubbling away at any given time. I became obsessed. I wanted to ferment EVERYTHING! I think that’s how it goes. lol But I make all our cheese now, cheese cake from yogurt I make and don’t buy anything fermented. My guts have taken a turn for the better like you would never believe from doing all this fermenting. I truly believe ferments have saved my life. Right now I’m getting ready for kimchi from my own kappa cabbage weighing in at 3 pounds from my garden in Hawaii. So lovely, so tasty. If you haven’t tried fermenting you have got to. You will be pleasantly surprised.
When I started fermenting about 20 years ago I made a batch of sauerkraut. You know; I bought about 6 heads of cabbage, a big fermenting crock etc. It took awhile, and then I had loads of sauerkraut I had to do something with like how do I store this stuff! Then about 3 years ago I discovered Sandor Katz and his quart jar method. My life changed. I became obsessed! I was fermenting everything. Now you can find from 1 jar to 10 or so jars on my counter at any time. Fermenting changed my life and my health. I will never stop eating ferments. I make all our cheese, yogurt, cheesecake with yogurt and drinks and everything.
I love fermenting. When I first tried it about 20 years ago it was get about 6 heads of cabbage, a large fermenting vessel and start shredding and pounding. It took a lot of time, and then I had to figure out how to store this stuff. Then I discovered Sandor Katz’s quart jar method. I was transformed! I started fermenting everything! Now you can find 1 to ten jars on my counter at any given time. Ferments have saved my life as I had many problems starting to develop. Everyone needs to know the importance of homemade probiotics and make them and eat them. They are sooooo delicious. I even think that sauerkraut isn’t sour!
I love fermenting. I tried about 20 years ago. You know: obtain 6 or so heads of cabbage, a large fermenting vessel and have at it. Start shredding and pounding. Than I discovered Sandor Katz’s quart jar method. I was transformed! Now I ferment almost everything and frankly I became obsessed. I started worrying; will I get sick from eating too much? Is there a too much? I started researching cultures around the world, and realized everyone eats them pretty much at every meal. Now you can find 1 to 10 jars on my counter at any given time. I also make sourdough bread, cheesecake and other desserts and ferment my hummus! Probiotics that I make saved my life and health and I think everyone should make and eat them. Our ancestors knew so much and most of it is lost but thankfully making a comeback!
I would have loved to go through your site as you had a lot of excellent information here, but your link is going somewhere else…
So glad you enjoyed the article, Robin! I checked through the links in this article, and cannot find a link that’s mean to go to another TGN article that is broken. (There are other links in the article that direct to outside sites on purpose.) Would you mind please letting me know which link is going to the wrong place? Thank you! -Merin @ TGN
I am defo going to try that salt free sauerkraut. My preferred drink is Jun, same as Kombucha but with green tea and honey, a much healthier drink, or so I like to think.
Kimchi is also a great probiotic food.
Thanks so much for these fermenting ideas!
I’ve been making kombucha and lacto-fermented pickles (in quart mason jars) for a dozen years now, and been eager to try new projects. I had read about kvass when beginning my fermentation journey, but hadn’t had success growing beets back then…now I’ve got the beets to try it out.
One other easy ferment I’ve been really into lately in lacto-fermented lemonade and orangeade.
To every 1 cup of fresh juice, add 3/4 cup sugar and 3/4 cup whey, shake and fill quart jar til near the top. let sit about 3 days, dilute with water (or ice) at 1:1 ratio and enjoy!
Now we’re begging friends with citrus trees to lend some fruits in exchange for some fermented juice! It really tastes better than fresh juice, with just the slightest fizz. My daughter loves it!
This sounds yummy, I can’t wait to try it!
Need to come back to this post to review recipes again. Found lac to fermented cabbage was great last year.
Great article! I have made my own yogurt sporadically for years. I have also made fermented buttermilk and kefir. I did a crock of sauerkraut once but chickened out on that one as it molded. I like the ideas of just filling a bowl with water to weight the kraut. Would be a lot easier to remove when the kraut is ready rather than trying to dig out a plate. I’ve also taken workshops where we have made Kombucha. Useful information on how to grow your own Scoby. Love Kombucha but it is so expensive to buy on a regular basis.
Thanks for a very informative article and there are great comments too.
Thanks for a great article!
You write, “some use the same transparent grains to ferment water kefir (see below), while others use specific strains of probiotics like Body Ecology’s Kefir Starter. “
Would you clarify which are best to use with nut/seed milks?
You write, “extend the shelf life of your kefir grains’ potency indefinitely” by alternating with dairy milk.
Since the grains normally last indefinitely, are you saying that using dairy grains (or water kefir grains) to ferment nut milks kills them after 5–6 batches?
Thanks!
This sounds amazing. I have been meaning to try kefir; I just have not had the nerve to do it yet as I don’t know if I will like it. Have been suffering from fatigue and an inability to eat much so am thinking this might really help my health.
Love sauerkraut! Never knew it was a good probiotic. Great stuff in this.