Have you ever considered growing fresh, nutritious food inside? If the answer is yes, then microgreens might be your perfect crop.
This guide explores how small-space homesteaders – even those in apartments or condos – can easily grow a bounty of microgreens indoors. From understanding what microgreens are and their health benefits to setting up your growing area, planting, harvesting, and troubleshooting, this guide will walk you through the entire process beginner-friendly.
Let’s turn that sunny corner of your home into a mini indoor farm!
What Are Microgreens?
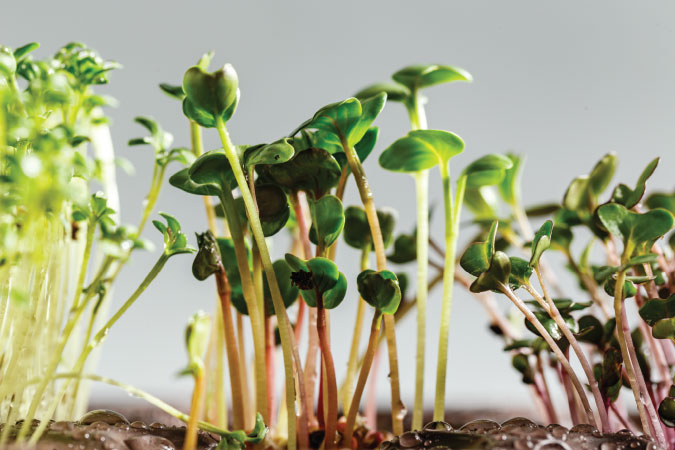
Microgreens are young vegetable greens harvested just after the seed sprouts and the first set of leaves (called cotyledons) have developed. They are essentially tiny versions of the plants they’d grow into, usually clipped when only 1–3 inches tall and just a week or two old.
Please don’t confuse them with sprouts! Sprouts are germinated seeds eaten before true leaves form, often grown in water. Microgreens, by contrast, are grown in a thin layer of soil or other medium and exposed to light so they develop leaves. This extra growing time gives microgreens richer color, flavor, and nutrition than sprouts.
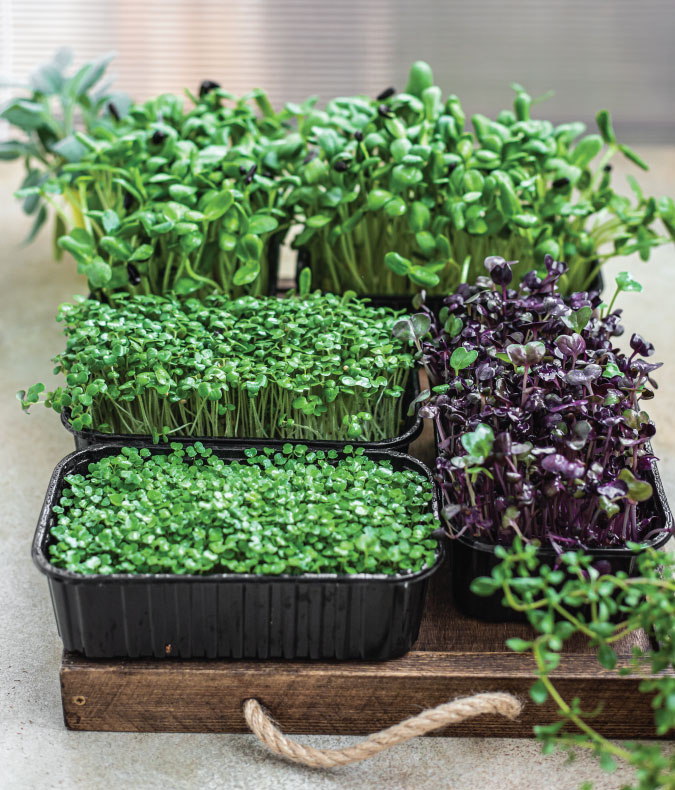
Microgreens can come from various vegetables and herbs – from radishes to basil to broccoli. If the plant has an edible leaf or stem, you can eat it as a microgreen. Popular varieties include radish, broccoli, mustard, pea shoots, sunflower, kale, and many more.
Each type has its own flavor: for example, radish microgreens are spicy, pea shoots are sweet, and mustard greens pack a zingy bite. These tiny greens aren’t just garnishes for fancy restaurant dishes – they’re a practical, easy crop you can grow year-round in your home.
Nutritional Benefits of Microgreens
Microgreens have earned a “superfood” reputation because of their nutrient density. Research shows that microgreens often contain higher concentrations of vitamins and antioxidants than their mature plant counterparts.
In fact, a study by the U.S. Department of Agriculture found that, on average, microgreens had about five times more vitamins (like vitamin C, vitamin E, vitamin K and beta-carotene) than fully grown leaves of the same plants (Specialty Greens Pack a Nutritional Punch : USDA ARS) (Specialty Greens Pack a Nutritional Punch : USDA ARS).
Another university study famously reported microgreens can pack 4 to 40 times the nutrient levels of the equivalent mature greens, depending on the specific nutrient and plant variety (Mighty Microgreens | College of Agriculture & Natural Resources at UMD).
That means a small handful of broccoli microgreens could deliver a bigger burst of vitamins than a whole head of broccoli!
These tiny greens are particularly rich in antioxidants – compounds that help our bodies neutralize harmful free radicals. For example, broccoli family microgreens (Brassicas) are noted for being high in vitamin E, a powerful antioxidant. Microgreens from the carrot family (like dill or fennel) tend to be high in vitamin A carotenoids.
What does this mean for you?
Including microgreens in your diet can help bolster your intake of essential vitamins and minerals (such as vitamin C, K, and iron) and plant compounds that support overall health. Some early research even suggests microgreens could aid in managing conditions like diabetes and heart disease thanks to their concentrated nutrients and antioxidants. Though eating them is not a cure-all, it’s certainly a smart way to enrich your diet with homegrown produce.
In short, microgreens offer big nutrition in a small package. They let you “eat your greens” in a convenient, home-grown form. Plus, because you eat them raw (e.g. in salads, sandwiches, or smoothies), you retain all those delicate vitamins that can be lost in cooking.
It’s hard to find a downside to these mini-greens: they’re tasty, beautiful on the plate, and packed with goodness.
Ideal Indoor Growing Conditions
Microgreens are wonderfully forgiving and designed for indoor cultivation – but providing the right conditions will ensure you get a healthy, abundant crop. Here’s what microgreens love in terms of light, temperature, and humidity:
Light Requirements for Microgreens:
Once germinated, microgreens need plenty of light to grow sturdy and green. A bright, sunny windowsill can work (south-facing is best), but avoid harsh, direct midday sun through glass, which can overheat or dry out your seedlings.
Indirect sunlight or gently filtered light is ideal. If natural light is limited (common in winter or small apartments), a simple artificial grow light will be your best friend. Microgreens don’t require massive, high-powered lamps – even an affordable LED or fluorescent grow light can provide the 8–12 hours of light they need daily. Position the light a few inches above the greens for best results (the further the distance, the more they might stretch and get “leggy” reaching for light). Many growers use a timer to give about 12–16 hours of light daily, mimicking long summer days. Remember, adequate light is key to prevent pale, spindly microgreens.
Temperature Requirements for Microgreens:
Microgreens are comfortable in the same temperatures humans are. Aim for room temperature around 65–75°F (18–24°C) for optimal growth. Most varieties germinate fastest at the warmer end (around 70–75°F) and grow well in the mid 60s°F. The good news is you likely already keep your home in this range. Avoid extremes – if it drops much below 60°F, germination and growth will slow; much above 80°F, you could encourage mold or “damping off” fungus in the dense seedlings. A stable, moderate temperature will keep your microgreen “garden” happy. If you’re comfortable in a t-shirt, your microgreens probably are, too.
Humidity & Airflow:
Microgreens appreciate a bit of humidity, especially during germination, but too much can cause fungus problems. Aim for moderate humidity (50–60%) in your growing area. When you first sow seeds, it helps to trap moisture by covering the tray with a lid or even plastic wrap – this creates a mini-greenhouse to sprout seeds faster. But once most seeds have sprouted, remove any cover to improve air circulation.
Good airflow is the enemy of mold – you don’t want stagnant, overly damp air sitting on your crop. If your growing spot is in a closed, still area (like a basement corner), consider using a small fan nearby to keep the air gently moving. This subtle breeze will strengthen the seedlings and prevent that fuzzy white mold from settling on them. In short, keep the soil moist but not soggy, and give your microgreens some “fresh air.” We’ll talk more about avoiding mold in the troubleshooting section, but proper humidity and airflow from the start make a big difference.
In summary, find a spot in your home that’s room temperature, with bright light (or use a grow lamp), and not too stuffy. Microgreens are adaptable—they don’t need perfect greenhouse conditions to thrive. Providing the basics of light, warmth, and water in your indoor micro garden will reward you.
Step-by-Step: Growing Microgreens Indoors in a Small Space
Now, let’s get our hands dirty! Below is a step-by-step guide tailored for small-space homesteaders. You don’t need fancy equipment – many growers start with recycled containers and a bag of potting mix. We’ll go from setup to harvest:
1. Gather Containers (Trays) and Prep Your Space:
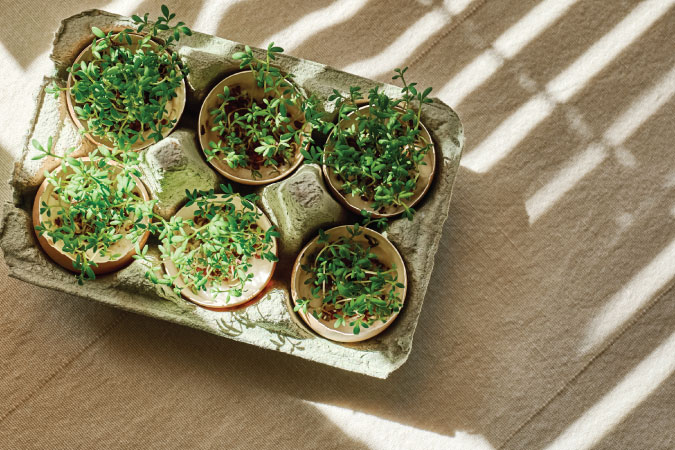
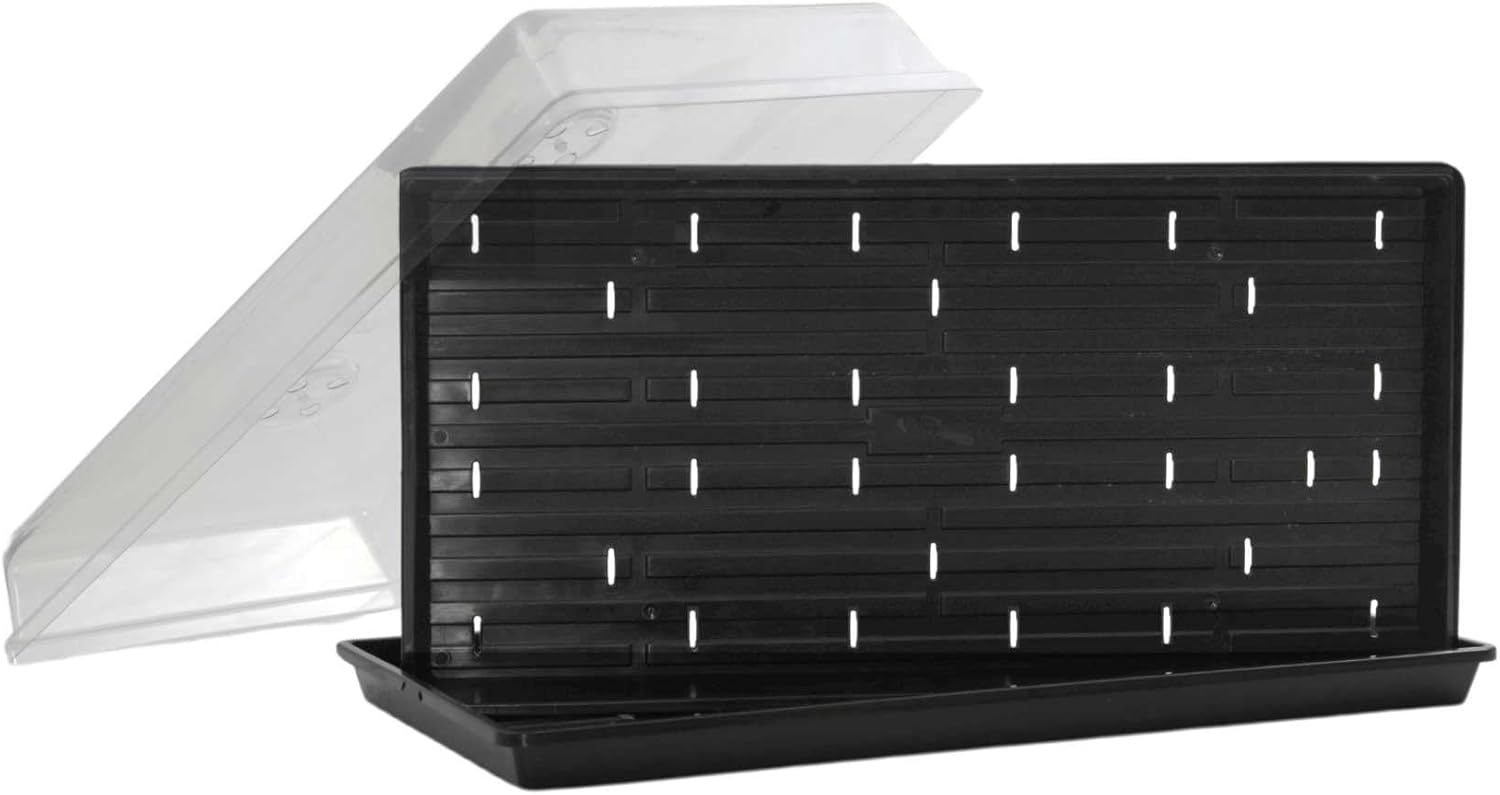
Choose a shallow container to grow your microgreens. It can be a purpose-made nursery tray or something repurposed (old takeout trays, produce clamshells, pie tins – as long as it’s shallow, around 1–2 inches deep). Ensure you can poke drainage holes in the bottom because good drainage prevents waterlogging. If using repurposed food containers, wash them well and punch a few small holes in the bottom.
You will also need a second tray or plate without holes to act as a water-catching base. (Standard practice is a two-tray system: one perforated tray nested inside a solid tray. Set this up in your chosen spot – somewhere you don’t mind getting wet or dirty. A windowsill, a kitchen counter near the sink, or a small shelf with a grow light are all great options. Tip: If working on a countertop, lay down a towel or mat to catch any spills of soil or water.
We highly recommend investing in something like the Bootstrap Farmer’s Hobby Bundle. Click here to check it out.
2. Add Growing Medium:
Fill your tray (the one with holes) with your growing medium of choice. The medium can be a sterile soilless seed-starting mix or a natural fiber mat designed for microgreens. Most beginners find a light potting or seed-starting mix works excellent—it holds moisture and gives the roots something to anchor in.
Aim for about 1 to 1½ inches of depth of soil mix in the tray. You don’t need a lot; microgreens have very shallow roots. Gently level and tamp down the medium so you have a firm, even surface to sow on. The soil should be moist but not muddy – if it’s dry, mist or sprinkle some water and mix it in beforehand. (It should feel like a wrung-out sponge: damp, but no excess water dripping.) A pre-moistened medium helps ensure all seeds have moisture contact from the start.
3. Sow the Microgreens Seeds Generously:
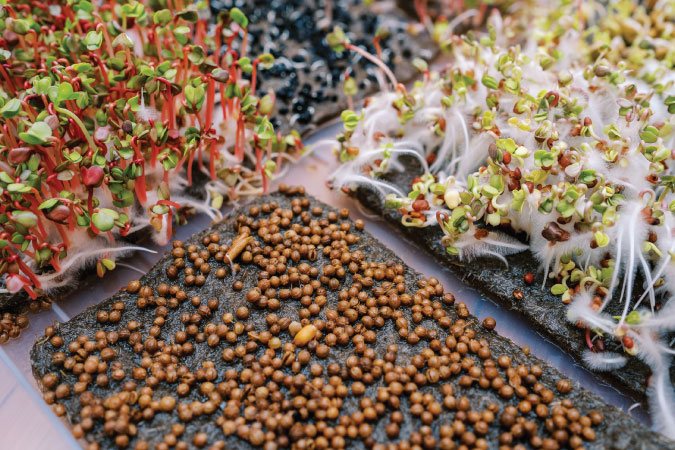
Now for the fun part – planting the seeds! Because each seed will become one microgreen, you’ll sow them much more densely than in a typical garden. Sprinkle the seeds evenly across the entire surface of the medium. You want a thick carpet of seeds, with most seeds about 1/8 to 1/4 inch apart. They can be close, even touching, but avoid big clumps or piles of seeds on top of each other. An “even layer“ is key– gently use your palm or a piece of cardboard to distribute seeds if needed.
Don’t be shy about seeding; a thin sowing will yield a sparse crop. For a small 5×5-inch tray, you might use a tablespoon of small seeds, whereas a large 10×20 tray could take several tablespoons of seeds—exact amounts aren’t critical, but more seeds = more microgreens.
Planting large seeds like sunflowers or peas requires soaking them in water for 6-12 hours first to jump-start germination. After soaking, drain and rinse the seeds, then sow as usual (large seeds can be placed by hand somewhat evenly). This pre-soak step is optional but often improves germination time and success for the bigger seeds.
We love True Leaf Market Microgreen Seeds.
4. Press and Cover (Optional):
Lightly press the seeds into the soil after sowing to ensure good seed-to-soil contact. You can use your fingers or a flat object to tamp them down gently. This helps the seeds stay moist from the medium below. Unlike in outdoor gardening, you do not need to bury the seeds under more soil – most microgreen seeds germinate well right on the surface (and too much soil on top can invite mold).
Some growers sprinkle a very thin layer of dry vermiculite or soil on top to hug the seeds, but it’s not required, so we skip this step.
Cover the tray to create a dark, humid environment for germination. You can cover it with an upside-down identical tray, a plastic dome or lid, or even just a piece of cardboard. This “blackout period” in darkness mimics being under the soil and encourages seeds to sprout strong, seeking light. It also helps retain moisture.
DIY tip: If you don’t have a tray lid, plastic wrap with a few air holes or a clean kitchen towel can work, but monitor dryness.
5. Microgreens Germination Period:
The seeds will germinate over the next few days with the tray covered. Please keep them in a warm spot (around 70°F is ideal) during this period. Check on them at least once daily. Use a spray bottle to mist the surface if it dries out. The goal is to keep the seeds and the top of the soil consistently moist (but again, not drowning in water). Within 2-4 days, you should see tiny shoots or stems pushing up. Different plants vary: fast ones like radish or mustard often sprout within 48 hours, while big seeds like sunflowers might take 4 or 5 days. Be patient. If you use a solid lid, you’ll notice the seedlings may push it up as they grow – a sign they’re ready for light! Generally, once most seeds have sprouted, or about 3-5 days in, it’s time to uncover the tray.
6. Uncover and Give Light:
When you remove the cover, you’ll likely see pale yellow or whitish sprouts. Don’t worry – that’s normal. Because they were in the dark, they didn’t produce chlorophyll, so they look blanched. Now is the time to move your microgreens into the light to green up and grow leaves. A simple light like this one will do just fine if you don’t have a sunny, south-facing window. Or, you could use lights like this one under for under cabinets or on a shelf.
Place the tray under your grow light or on your bright windowsill. If using artificial lights, keep them reasonably close to the tops of the sprouts (a few inches away if it’s a fluorescent or LED that doesn’t produce much heat, or 6-12 inches for stronger lights.)
The sprouts will turn green quickly, usually within a day of exposure to light, as they produce chlorophyll. At this stage, remove any humidity dome or plastic – your microgreens no longer need to be covered, and you prefer fresh air to prevent disease.
7. Ongoing Care (Watering & Light):
You’re in the growth phase. Microgreens grow fast – you’ll be amazed how quickly they shoot up. To keep them happy, ensure they get plenty of light each day (generally 12-16 hours of light, followed by a period of darkness to rest) and water them as needed to keep the growing medium moist.
A great method is to water from the bottom. Instead of spraying or pouring water on top (which can encourage mold or disturb the delicate seedlings), pour water into the bottom (non-hole) tray and let the soil soak it up through the drainage holes.
After you uncover the microgreens, start bottom-watering by adding a quarter inch of water to the bottom tray and letting the soil draw it in for a few minutes, then pour off any excess. Bottom-watering keeps the foliage dry while hydrating roots. You can occasionally mist from the top if the surface looks dry – do so in the morning so leaves aren’t wet overnight. Check moisture daily; microgreens can dry out quickly because their root zone is shallow. But also be cautious not to overwater – do not let the trays sit in standing water for long periods.
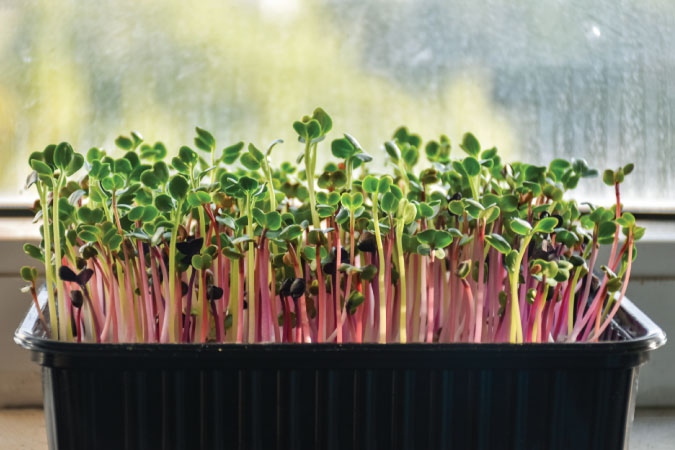
Good drainage and only watering when needed will prevent most issues. Also, ensure some airflow around the greens. With proper light and watering, you’ll see the cotyledon leaves fully expand and perhaps even the first tiny “true leaf” of the plant emerge. The microgreen forest will become lush and usually uniformly green (some varieties, like cabbage or kohlrabi, have beautiful purple hues, too).
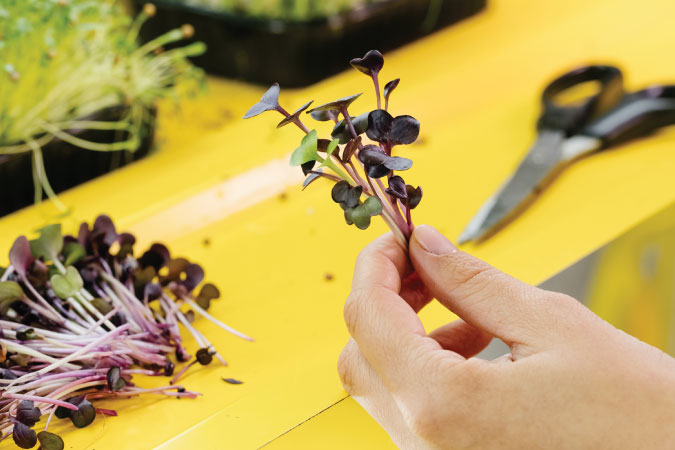
8. Microgreens Harvest Time!:
Depending on the variety and conditions, most microgreens are ready to harvest about 7–14 days after sowing. Some quick ones (radish, broccoli, mustard) can be ready in as little as 7-10 days, while slightly slower ones (sunflower, pea, basil) might take 2 weeks or more.
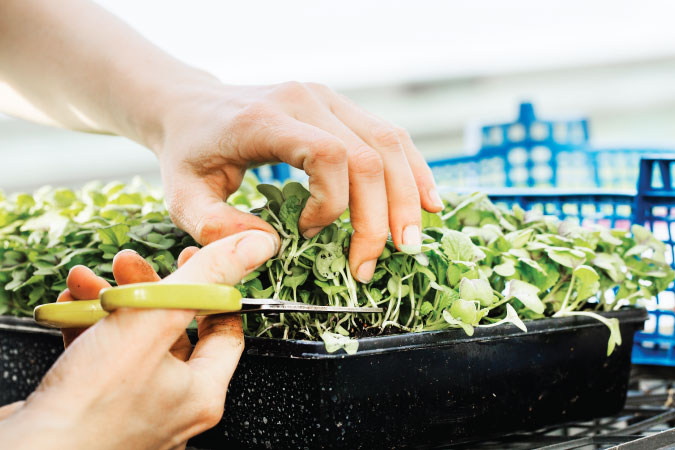
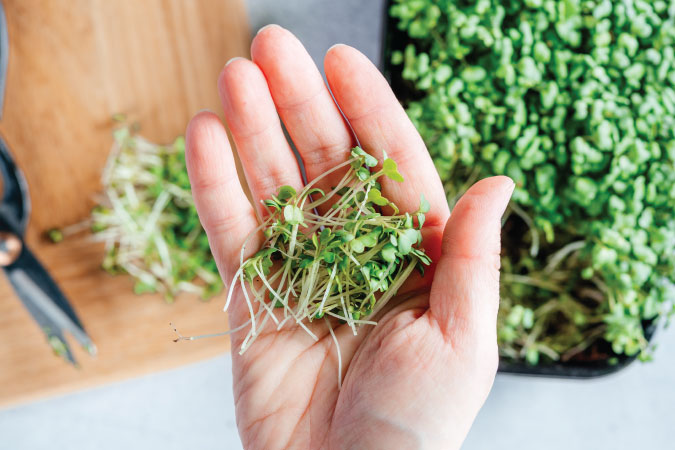
A general rule: harvest when they are 1 to 3 inches tall and have at least expanded cotyledons and often a hint of first true leaves. If you wait too long, they can get tougher or flop over, so earlier is usually more tender. To harvest, use a sharp pair of clean scissors or a knife. Cut the microgreens just above the soil surface, grasping a handful gently as you snip. Try not to pull them up (you don’t want roots or seed hulls in your mix). It’s best to harvest before you use them for maximum freshness and nutrition. You can harvest the whole tray at once or cut as needed – but once they’ve reached their prime, they don’t keep growing new leaves (they’re seedlings, not like cut-and-come-again lettuce). So, it’s common to do a “clear-cut” harvest and then start a new batch.
9. Post-Harvest – Use or Store:
If you’re eating your microgreens immediately, give them a quick rinse in cool water to remove any bits of soil or seed hulls (especially for those like sunflowers that may retain seed shells). Pat dry, or use a salad spinner to remove excess moisture. If you need to store microgreens, line a container or zip-top bag with a paper towel, place the dry (not wet) microgreens inside, and refrigerate. Most microgreens can last about a week in the fridge when stored dry and cool – some sources say up to 10 days, though they are most nutritious and flavorful when very fresh.
Delicate greens like amaranth or basil microgreens are best used within a few days. Hardier pea shoots or sunflower shoots might last closer to a week. Avoid crushing or packing them tightly in storage to prevent rot.
10. Clean Up and Start Again:
One of the joys of microgreens is the quick turnaround – you can immediately start another tray and have a continuous supply. After harvesting, you’ll be left with the tray of roots and spent soil. You generally cannot reuse that soil for another round of microgreens because it’s full of roots and depleted of easy nutrients. Dump the used medium out – preferably into a compost bin. (The old roots will break down into wonderful compost, which you can later use in your outdoor garden or potted plants, completing the cycle.
Clean your trays with warm water (or a diluted bleach solution if you suspect any mold issues), and you’re ready to sow the next batch! Many homesteaders get in the habit of starting a new tray each week for a continuous weekly harvest of microgreens.
That’s it – you’ve grown your microgreens from start to finish in your home. Once you get the hang of the process, you can stagger plantings (start a new tray every few days) to have an almost daily supply of fresh greens. It’s a simple cycle: sow, grow, harvest, repeat – perfect for a self-reliant home gardener.
Read More in this Series:
Common Microgreen Growing Problems: A Troubleshooting Guide
The Top 5 Easiest to Grow Microgreen Varieties for Beginners
Harvesting and Storing Microgreens
Our Favorite Microgreens Supplier:


