Welcome to the Organic Growers’ Tool Kit Series
Tool #8: Irrigation Techniques
In our last post in this series, I wrote about the importance of water management for building good soil. In this post, I’ll cover some irrigation strategies you can use in a home garden.
Now, keep in mind that irrigation is just one tool in a larger water-management plan built on applying organic matter, smart planting, and good drainage design for your soil type.
Too often, people worry about irrigation before they’ve got their soil in order. This is like trying to put gas in your car before you’ve installed a gas tank. If you’ve got great soil and drainage already, then read on. If not, you may want to check out the rest of the series, too!
Read More: Organic Growers’ Tool Kit Series
To Automate or Not to Automate
Many years ago, I first read John Jeavons’ amazing book, How to Grow More Vegetables*. He offered a comprehensive garden-preparation, soil-management, and seed-starting plan that was built entirely on plant matter and a few externally sourced mineral inputs.
One part of his program that really shocked me was that he watered everything by hand. His go-to tools were a watering can or a hose and spray nozzle. There were no complicated self-watering irrigation systems in his food self-sufficiency system.
Back then, I thought he was crazy. Now, I manage almost 1.5 acres of food-growing space using the exact same tools!
When you are starting seedlings or are in between plantings, watering (or sufficient rain) is always necessary to keep soil thriving. Prepared soil that is constantly planted, though, only needs watering during extended dry periods.
If you live in an area where extended drought is guaranteed, or if you plan to plant crops you harvest all at once (e.g. row crops), you may need to think about automation. Otherwise, on the homegrown food scale, hand-watering is very doable.
Automated Irrigation Basics
If you do need to automate irrigation to make watering a manageable chore, there are a few basic facts to keep in mind.
1. All Irrigation Systems Require Sufficient Water Pressure
Depending on the length of irrigation line you plan to run and the emission method you use, you’ll need a certain amount of pressure to ensure water delivery across your whole system.
Longer systems require higher water pressure to operate. Also, delivery methods that dispense greater flow, such as soaker hoses or drip line with closely spaced emitters, will need more pressure to operate. Running lines on slopes also results in pressure loss over distance and so will require higher pressure at the outset.
Before you decide on an irrigation system, check your water pressure using a calibrated gauge so you know what you have to work with. Electric or gas-powered pumps can also be used to increase water pressure if necessary. Pressure regulators can be used to throttle excessive or irregular pressure rates.
For gravity-fed irrigation systems, you need to plan sufficient elevation change and/or use limited-length, slow-release emission systems to water your plants. You can even buy low-pressure irrigation kits designed to operate with a 55-gallon rain barrel.
2. All Automated Systems Require Maintenance
Automated irrigation systems require constant pressure to work well. Clogs in emitters can cut off flow to other parts of the system. Fluctuations in pressure can damage lines.
Ensuring that your system is effectively watering plants all the way down the line is important for proper performance. Quickly addressing clogs in emitters and patching hoses can extend the life of your system.
All irrigation lines degrade through use and need to be replaced regularly. Covering lines with mulch can protect against UV damage. However, that can sometimes lead to more clogs.
3. Water Quality Matters
In order for an irrigation system to work well, the water going into the system must be high quality.
Water with debris, such as pond water, must be filtered before it enters the system. Water with excessive mineral deposits can also lead to clogs in irrigation systems. Maintaining filters means extra work and costs. But fixing clogs from debris-filled water takes even more time and money.
Water treated with chemicals, like chlorine, will not necessarily increase the chance of clogs. However, it may not be suitable for direct use on soil without aeration or filtration.
You May Also Enjoy: “A Guide for Using Tap Water in Your Garden”
Automated Irrigation Options
If you decide to go the automated irrigation route, you have a few options.
Drip Tape
Drip tape is the cheapest and easiest form of irrigation to apply. At the time of planting, you roll out your tape near the root zone of the plants. Because the water emission rate is very low with drip tape, you can even use this method in short runs for low-water-pressure systems.
Drip tape is generally made to last 1–2 years in the ground. This means there’s a lot of waste when using drip tape. However, you can find ways to repurpose black drip tape.
Drip Line
Drip line is a step up from drip tape. You can buy it with built-in emitters spaced 6, 12, 18, or 24 inches apart. Or you can buy solid line and install emitters where you need them.
The amount of pressure you need to run your system will depend on your final emitter spacing, the length of the system, the diameter of the tubing used, the slope of your land, and other factors. Quality drip line, covered with mulch, can last up to 7 years. But it costs more and requires greater water pressure to work well.
The problem with drip tape and drip line is that they only water plant roots and not all of your soil. This creates the “oasis” effect covered in this article.
You May Also Enjoy: “7 Keys to Good Water Management in the Organic Garden”
Soaker Hoses
In terms of watering your entire body of soil, soaker hoses are a better option. Unfortunately, soaker hoses require high pressure to work well.
They take more work to adapt them for off-grid watering systems. Big gravity gains, or a gas-powered pump, might be needed to achieve sufficient pressure.
Also, soaker hoses are entirely permeable. This makes them prone to tearing and degrading quickly in some climates and soils. They clog easily if the water used is not properly filtered.
Sprinkler Systems
Sprinkler systems have fallen out of favor in the gardening world. They are considered inefficient at delivering water to the root zones of plants.
Also, when the water droplets hit the soil with the force of gravity, they can cause fungal pathogens to bounce up and hit the undersides of your plants. This can lead to increased fungal problems.
Personally, I think a well-directed sprinkler, delivering rain water—pumped from a pond or rain-collection cistern—is a perfectly wonderful way to water your soil. This nearly replicates what nature does when it rains on your garden.
Using sprinklers with highly processed municipal water sources, though, often comes with dollar and environmental costs. In areas with limited water supplies, it may be prohibited. Also, sprinkler systems require high water pressure.
For short periods of time, using city water, a garden hose, and an oscillating sprinkler attachment to keep your soil moist is a much better option than not watering at all!
Off-Grid Alternative
All four of the methods above can be adapted for off-grid irrigation using gravity-fed water systems and/or solar- or wind-driven pumps. Just remember to plan sufficient pressure, to filter debris from natural water sources, and to expect to do maintenance.
Note: If you want to plan an automated irrigation system for your landscape, Rain Bird has an excellent 140-page manual to help you establish your exact calculations, tube sizes, emitter distances, etc. It also includes information on setting up gravity-fed systems. Click here to view Rain Bird’s Landscape Irrigation Design Manual.
Semi-Automated Irrigation Options
There are also quite a few semi-automated irrigation techniques to consider. Here are few that come up often in my research:
The 5-Gallon Drip Irrigation System
You can create a super simple, gravity-fed, drip-irrigation system using a 5 gallon bucket. These are sometimes used in drought-prone developing countries, where carrying 5 gallons of water at a time is the norm for inhabitants.
Note, it takes .62 gallons of water per square foot of soil to simulate 1 inch of rain. So, a 5-gallon bucket will only water roughly 8 linear feet of garden soil per week. This can be useful when starting seeds or transplanting seedlings.
Clay Pot Irrigation
You can also bury clay pots (hole-filled) in the ground and fill them with water. The water leaches through the porous pots to keep surrounding soil moist over time.
This works well to keep soil moist in dry, windy areas. However, the pots are expensive and have to be removed in locations where the ground freezes.
You can fill the pots quickly rather than watering your soil slowly. Also you don’t have to monitor your soil moisture content quite as frequently as with hand-watering.
Wine bottles and glass globes, inserted into emitter tips, are also used as a variation on the clay-pot irrigation method. These are better for use in container or house-plant applications to avoid broken glass in the garden.
Self-Watering Containers
Self-watering planters are fairly common. They basically have watering pans in the bottom from which soil and plant roots wick up moisture as needed. At the container level, this makes sense because the costs are manageable.
If you are gardening in raised beds, you can apply this concept on a much larger scale and create self-watering raised beds. However, you can usually install a simple drip line or soaker hose system for less. And root rot can be a concern in shallow beds.
Non-Automated Watering
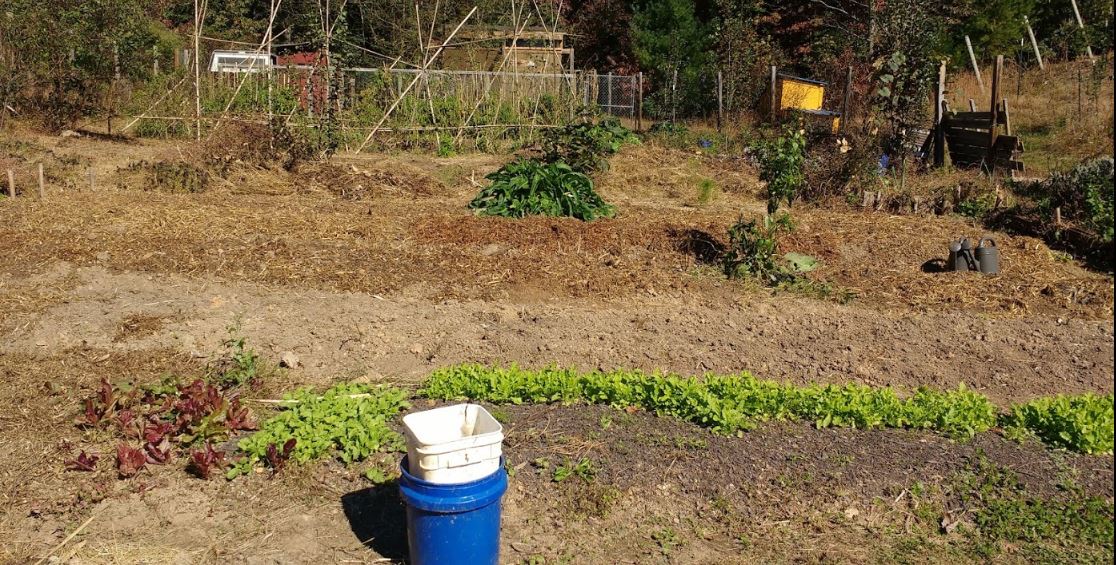
As I said earlier, like John Jeavons, I am a hand-watering advocate. I use 2-gallon cans that cost $5 from my big box garden center.
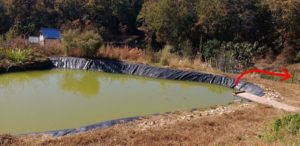
I do have a trick, though. I catch water in an irrigation pond that is uphill from my garden.
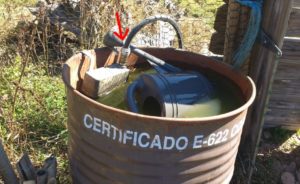
Then, I use a garden hose, a 55-gallon drum, and a float valve to deliver water from the irrigation pond to my garden.
This could easily be converted to a low-pressure drip system if I needed to do so. But, I prefer to hand-water.
Using Watering Cans
I just dip my watering cans directly into my 55-gallon drum to fill them. Dipping cans is much faster than filling them from a hose or faucet.
For bare soil, I water at a rate of a 2-gallon can per 3 linear feet of garden area each week. This is equivalent to a little more than one inch of rain, which is about what your soil needs when not stocked with living plant roots.
When starting seeds in the ground, or if it is windy and my soil is drying fast, I also water daily at a rate of 2 gallons per 8 linear feet of garden area to keep the upper layer of soil from crusting and to encourage seeds to sprout.
The Garden Hose
During droughts, I may take out the garden hose and deep-water my planted beds to ensure my soil stays moist. You can use the John Jeavons method of watering until your soil stays shiny for one-half a second to 15 seconds after you stop watering. Or, you can take a mathematical approach.
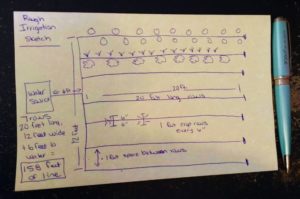
In order to figure out how much water to apply using a hose, you need a timer and a 5-gallon bucket. Start your timer when you start filling the bucket. Stop it when the bucket is full.
Five gallons of water will cover about 8 linear feet of garden beds. So, water each 8-foot-long by 1-foot-wide run for the amount of time it took to fill your 5-gallon bucket.
Best-Birthday-Cake Soil
The rates suggested above are guidelines to help point you in the right direction of good irrigation practices. Ultimately, your goal is keep all of your garden soil feeling like the most moist, “best birthday cake” you’ve ever had.
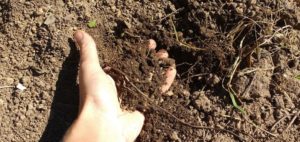
Always let the feel of your soil be your guide to when and how much to water. Your soil life and plants will thank you!
What Do You Think?
Do you have any strategies for watering that have been useful in your garden? Do you favor hand-watering or automation? Have you thought about the quality of your water? We want to hear from you! Share your experience and thoughts in the comments section below.
_________________
The Grow Network is a participant in the Amazon Services LLC Associates Program, an affiliate program designed to provide a means for our team to earn fees for recommending our favorite products! We may earn a small commission, at no additional cost to you, should you purchase an item after clicking one of our links. Thanks for supporting TGN!

Tasha Greer is a regular contributor to The Grow Network and has cowritten several e-books with Marjory Wildcraft. The author of “Grow Your Own Spices” (December 2020), she also blogs for MorningChores.com and Mother Earth News. For more tips on homesteading and herb and spice gardening, follow Tasha at Simplestead.com.


COMMENTS(4)
This was well timed. I’m going to have to add some extra irrigation (of some form) this year, and I’ve been weighing my options.
Hey Scott – I’ve actually started experimenting with direct applications of humic acids to reduce watering needs and increase nutrient uptake. These are basically what you get when you let compost age for 5+ years (which most of us don’t have time for). They’ve cut down the winter watering I have to do in the greenhouse. But we’ll see how they do outside come summer! Good luck on your 2020 gardening!
This was excellent timing! We just decided to take a trip this year and someone will have to manage the garden while I’m gone.
Hey Lexie – I’m not sure where you live, but I actually did an experiment in one of my gardens last year where I left my garden completely untended, except for harvesting during our hottest, driest period with no irrigation. Thanks to all the organic matter I used and what I call “nutrient” paths, I had amazing results. So, I highly recommend you start with Organic Tool # 1 – Organic Matter, as much of it as you can get in your garden, then the rest is easier! Happy Gardening! And enjoy your travels! Tasha