When I used to sell farm-raised, hand-processed duck at the market, I only had a few customers who truly knew its value. Most of the people I encountered didn’t know how to cook duck well, and would say something like,“Isn’t it really greasy?” or “I had it once and it’s too chewy.”
Unfortunately, poor preparations have given duck meat a bad name. This is a darn shame, because duck done right is one of the tastiest, healthiest, and (potentially) most sustainable meat sources around. Ducks are also wonderful workers in your edible landscapes, food forests, and even your garden (at times).
In case you happen to be one of those people who know the pleasure of perfectly cooked duck, or are interested in dispelling the bad rap duck has by cooking it well at home, read on for some delicious details on how to cook duck!
A Tender Age
The first thing to know about cooking duck is that age matters. In large-breed, flightless ducks that grow quickly, such as Pekins, processing by 3 months of age will produce the most tender meat. In birds that still fly, harvesting before they begin flying regularly ensures tenderness.
In any breed of duck, once they achieve their full weight and begin covering longer areas to forage and maintain that weight, their muscles will get leaner and less tender. Young duck is essentially like the “veal” of duck. Similar to veal, the more confinement and less movement of the muscles during growth, the more tender the meat will be.
Personally, though, I can’t imagine confining a duck and not giving it access to fresh pasture and a pond. Also, truly free-range ducks, with a little more age, have a lot more flavor, steak-like color, and better texture than young duck. With older, more seasoned ducks, good preparation is key.
If you plan to roast a whole duck, make sure you start with a young duck. If you want duck meat with a bit more flavor, though, plan to prepare each cut—legs, breasts, tenderloins, wings, and carcass—using different cooking methods.
Here are some basic preparation instructions to get you started.
Duck Breast
On meat-type ducks such as the Muscovy or Pekin, a single breast is usually large enough to serve 2 people. For small plates or tapas style dishes, you can even cut the breast into medallions (after cooking) and serve up to 6 people.
Simple preparations are best for the duck breast.
Method #1: Seared Duck Breast
Age your breast in the fridge, in a covered container, for 1-2 days after processing or defrosting. This is important because fresh-processed meat benefits from a resting period before cooking. Store-bought duck is frozen fresh, so it also needs aging after defrosting.
Pat your duck breast dry. Score the skin using a sharp knife. Rub salt into the breast. Use enough salt to work some into the entire breast. You can also add pepper and herbs at this time for seasoning. Let your salted breast rest in the fridge for 1 hour before cooking.
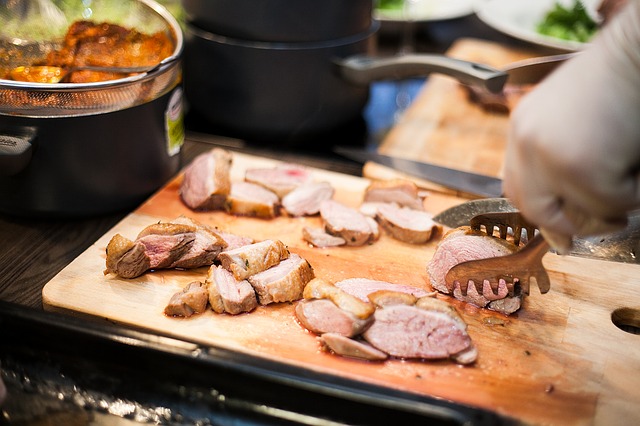
Heat your cast iron pan. Melt two pats of butter in the pan. When your pan is almost smoking-hot, wipe any extra salt off your duck, and put it in the pan fat side down. After the initial sear (about 1-2 minutes) lower the heat and cover your pan. Cook for an additional 7-8 minutes for rare to medium-rare or longer for medium to well temperatures.
Flip your breast and cook for 1-2 minutes on the meat side. You only want to cook it long enough to give it deep color on the meat side. Remove the breast and let it sit on a cool plate for 10 minutes. Slice and serve.
You can also “deglaze” the pan by pouring about 1/2 cup stock or wine in the still-hot pan and swirling it around. Then, you can use this liquid as a sauce for your breast. Make sure the liquid you use is at room temperature (or above) to avoid breaking your pan.
Method #2: Duck Prosciutto
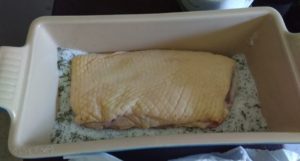
Bury your duck in salt and keep it in the fridge for 2 days. Take the breast out, rinse it, and pat it dry. Hang your breast in a thin cloth, at temperatures between 50-70°F (10-21°C) until dry (usually 2-3 days). Slice your finished prosciutto super thin and serve on a garnished platter.
Safety Note: Similar to beef steak and ham prosciutto, many people eat their duck rare and raw cured. However, like driving a car or eating sushi, this is a personal choice and comes with inherent safety risks. To learn more about safe duck preparation recommendations, read the USDA food safety guidelines related to preparing duck.
Read More: USDA Food Safety Guidelines on Duck
Duck Leg
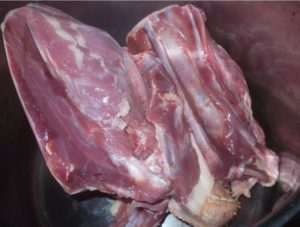
Duck leg, also called the thigh, is a cut that usually includes the entire leg and some part of the meat from the back. The thigh muscles are the most exercised muscles for any kind of duck and tend to be tough in texture in both young and old ducks.
Method #3: Slow-Cooked Duck Leg
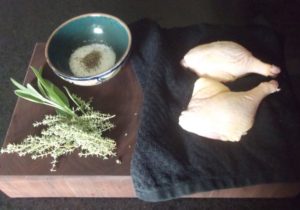
To make tender duck legs, start by massaging about a half tablespoon of salt into each piece. Cover and let this rest and marinate in the fridge for 2 days. Then rinse the legs and pat them dry.
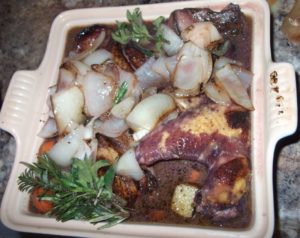
Heat your oven to 250°F (121°C). Put the legs, skin side up, in a close-fitting pot. Pour some liquid in the bottom of your pan (wine, stock, or water all work). Put a pat of butter on top of each leg. You can also tuck garlic cloves or fresh-cut herbs such as rosemary, thyme, or hyssop around the legs for aroma and flavor.
Cover and cook for about 4 hours. Periodically, about every 20-30 minutes, open your pot and braise the legs.
Optional: If you don’t want to worry about braising your meat over a 4-hour period, then add enough liquid to entirely cover the leg. For the last hour, drain the liquid and continue cooking to allow the skin to dry out and crisp. Braise during this final cooking period.
The meat is done when you can start to peel it from the bone with a fork. If it feels like it will need a knife to cut, then cook it longer. Continue braising until you remove it from the oven to keep the skin and edges from drying out.
If the skin is not quite crispy enough for your liking, put the legs under the broiler, skin side up, for a minute or 2 until they are perfect.
Method #4: Duck Leg Confit
Duck leg confit—a fine French delicacy—is prepared almost the same way as a slow-cooked duck leg. However, instead of using liquid and braising the leg, you will need to completely cover it in lard (duck or pork lard).
Also, turn the temperature down to 200°F (93°C) and cook for 5-6 hours for even better results. Add more lard as necessary to keep the legs covered while cooking. Broil the skins at the end of cooking to make them crispy.
Once the leg is almost—but not quite—falling off the bone, put the legs in a jar, cover them completely with some of the pan-cooked lard, cover, and leave in the fridge for several days to a month. The longer your legs linger refrigerated in the duck-flavored lard, the more flavorful and tender they will be.
Again, this procedure does not meet the USDA guidelines for safe meat handling. So, if you have safety concerns, you can also eat the duck leg immediately after cooking, hot or chilled.
Other Parts
There’s a lot more to a delectable duck than just its breasts and thighs!
Method #5: Duck Rillette
Rillette is basically potted meat. It’s a kind of pâté that you can spread on bread or crackers. This is my favorite way to prepare older duck and to use the wings and bits of carcass meat left behind after the other cuts are made.
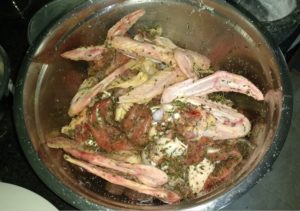
For rillette, salt the meat as you would for duck leg confit. I use about a half tablespoon of salt per pound of meat for my marinade. Refrigerate 2 days, wash, dry, cover with lard, and slow cook at 200°F (93°C) until the meat is starting to fall off the bone.
You can add herbs and spices like fresh ground pepper or quatre epice (French spice blend) while cooking to personalize your rillette. You can also chop and add herbs like tarragon, thyme, and parsley to your rillette for extra aroma.
Drain the fat from the pan. Allow the meat to cool. Pick the meat from the bones. Mince the meat and mix it with some of the fat from the pan. Pack the pâté in jars. Pour 1/2 inch of fat over the pâté to seal the meat beneath. Close the jars and refrigerate. The salt, slow cooking, and fat act as preservatives to keep the meat safe for eating for longer than cooking alone would.
Many people will keep their rillette in the fridge for a month before eating to develop full flavor and texture. Others will pressure can it and eat it over the course of a year. Personally, I can never wait more than a week. Though, the few times where I have managed some self-restraint, I noticed the rillette gets even better after a few weeks of storing.
Method #6: Tenderloin Tidbits
The tenderloin on a duck is located just underneath the breast. It is attached to the breast bone by a not-so-pleasant-to-eat piece of silver skin. Many people have a hard time getting that silver skin out without mangling the tenderloin meat.
Rather than worry about doing it perfectly, scrape the tenderloin off the silver skin, mince up the meat, and sauté it with garlic, butter, salt and pepper. Like garlic, the tenderloin only needs a minute or 2 of cooking. So, get your pan hot and your butter melted before you toss in your minced tenderloin and garlic.
Remove from heat once the bits are lightly browned. Toss this in salads, serve on toast, or use like bacon bits on the top of some creamy, savory, thick winter soup.
Method #7: Duck Stock
Other than the cuts covered above, I take the rest of the carcass, including the neck and any extra skin and fat, to cook it up as bone broth or stock. For more details on the how-tos and benefits of bone broth, check out this post:
Read More: “Benefits of Bone Broth: Myth or Magical Mystery?”
Method #8: Duck Lard
Once you have chilled your stock, scrape the fat that rises to the top from your container. Use that as you would butter for cooking savory dishes.
Add Your Favorite Flavors
All of the methods above are just the starting point to preparing duck. You can use these basic techniques and pair them with all sorts of other ingredients. Orange glazes, gravies, wine reductions, Asian flavor preparations, and more all go well with duck.
Conclusion
Duck is an extremely versatile, flavorful, and healthy meat that is easy to raise at home. If you want to learn more about raising duck for eggs, meat, and fun, then consider joining the Honors Lab and taking our 8-part certification on Raising Backyard Meat Ducks, including details on how to raise them, process them, and cook them.
What About You?
What are your favorite ways to prepare duck? Let us know in the comments below!

Tasha Greer is a regular contributor to The Grow Network and has cowritten several e-books with Marjory Wildcraft. The author of “Grow Your Own Spices” (December 2020), she also blogs for MorningChores.com and Mother Earth News. For more tips on homesteading and herb and spice gardening, follow Tasha at Simplestead.com.





COMMENTS(4)
I have this fantasy in my mind. There’s a field near where I live, on some family land. I like to daydream about using it to grow all sorts of medicinal and edible plants, and turning it into a large garden and food forest for my family. There’s a pond right by it that I would use as a water source.
It’s really too big for me to handle right now. I’m still growing as a gardener. But it’s a nice fantasy. Maybe in the future. And now my fantasy also has ducks in the pond and waddling around the plants.
Great article, Tasha! Thanks for the useful info!
Thanks for the article Tasha! Your duck course is fantastic! Making bone broth and using the duck fat from there is much easier than rendering the fat in the oven. And those recipes….Yum!
Hey Wendy – Sounds like you love ducks like I do! Glad you enjoyed the course and hope you get to use some of the recipes. I have a few too many males right now, so I have to start process a few at once. They are on the older side, but that makes them tastier for a big batch of rillette and confit to enjoy served with the greens starting to come up in the garden. Best to you! Tasha
Great suggestions! Thank you! I have ducks but haven’t eaten any yet.