Pest management and pathogen control are great reasons to use crop rotation. For me, though, nutrient management is my most important reason.
Our soil was devoid of organic matter when we moved to our homestead. I sheet-mulched, piled my beds with fresh compost, cover-cropped, chopped and dropped, trench-composted, and spread worm castings like I was icing a cake.
In short order, we had incredible yields. I thought I was a gardening genius…
The first clue that I’d run up against diminishing returns on compost applications was my parsnips. The tuber-tops peaking from the soil were 5 inches wide. The greens were shrubs. I expected a lifetime supply of parsnips. Then I harvested. My parsnips were only 2-3 inches long and looked like parsnip pancakes.
That’s when I learned about nitrogen overload from compost. I yanked my disappointing parsnips and planted corn. My corn was supposed to grow 6 feet tall and have 1 large ear and 1-2 small ears. I got 3 full-sized ears on 10-foot stalks.
With the magic of crop rotation revealed to me in that experience, I studied it and experimented extensively to create optimal crop rotations. Here’s what I learned.
1. Start with a Soil Test
If you haven’t had a comprehensive, professional soil test recently, get one. You’ll be surprised by how much they can tell you about your soil and gardening practices.
Mineral Content
Soil tests include listings of mineral content. If you have deficiencies, they will include application rates for minerals to bring your soil up to par.
They’ll include the phosphorous and potassium (the PK in NPK) content. If you are a regular compost user, it’s easy to overload soil with phosphorous and potassium. This test can let you know if your compost habits put you at risk for excesses.
Soil pH
Soil tests divulge soil pH. Unless your pH is right for what you plan to grow, you might as well be planting on the moon. Most vegetables like a pH around 6.5.
You may have to add lime to make soil alkaline (e.g. raise the pH). Alternately, you may have to add sulfur to acidify soil (lower the pH). A soil test should include recommendations for this, too.
Organic Matter Content
Tests also tell you how much organic matter is in your soil. Less than 3% and you need to add a ton (or tons) of organic matter to get your soil into shape for growing healthy vegetables.
Nitrogen
Nitrogen level is the one thing a good soil test will not tell you. Or, it should warn you that nitrogen results are unreliable. Nitrogen, in the soil, is inherently volatile.
Nitrogen changes based on what you plant (or your weeds), tilling and harvesting practices, amendments used, weather (e.g., lightning adds nitrogen), and water sources. Heavy rain can leach nitrogen, while acid rain adds it.
This volatility is why nitrogen is one of the most difficult forces to manage in a vegetable garden. It’s also why professional growers tend to use slow-release fertilizers, or multiple applications.
If you are like me, though, you want to use stuff you can produce at home without spending a fortune. In that case, consider rotation plans that include rotating your food crops, cover crops, and homemade amendments for nutrient management.
Start by making the adjustments determined by your soil test. When you have a good soil-health baseline, start using crop rotation for long-term nutrient management and soil improvement.
2. Rotate Food Crops by Nitrogen Needs
Nitrogen is like candy to plants. They love it. Some plants can eat all the nitrogen they want and grow better. Others eat too much and end up sick. And just like people sometimes do with candy, plants are prone to eat too much nitrogen when it’s available—even when it’s not good for them.
Plants do need some quantity of nitrogen to grow. The right quantity is good for them (I can’t say the same about candy for people). Still, this analogy offers an easy framework for understanding nitrogen and its use in crop rotations.
To manage plant consumption of nitrogen, the first thing you do is load up the nitrogen in your soil. Then start the rotation party!
- Start with plants that thrive on nitrogen—a.k.a. heavy feeders.
- After the heavy feeders, bring in plants that benefit from moderate nitrogen. These are your medium feeders.
- When the nitrogen is nearly depleted, bring in the candy addicts. These plants can’t handle much nitrogen, but they love it so much they’ll suck every speck of it out of your beds. We call these light feeders, but they are really more like the cleanup crew.
- Once your bowl is empty, refill it and start the progression again. Grow nitrogen-fixing plants or add nitrogen-heavy amendments like fresh compost. Or do both.
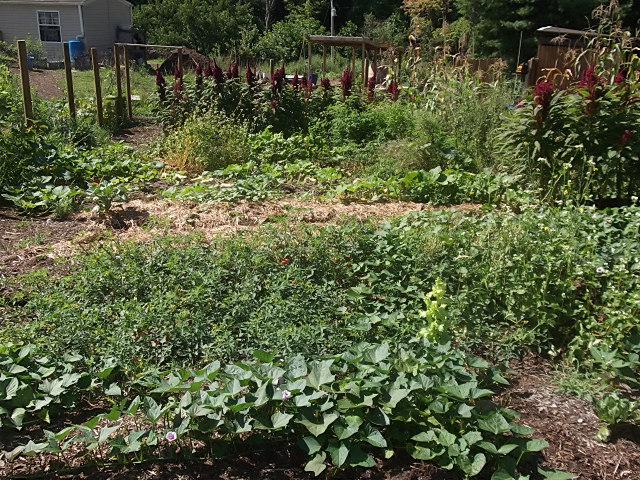
Real Garden Crop Rotation
In a real garden scenario, this would look like adding a whole bunch of compost and fertilizer to your beds. Then, plant corn, followed by cucumbers, and finally turnips. Next, add more fertilizer and/or bring on the beans (or peas, or clover…).
If you spread this cycle over a four-year period, you have also created a rotation schedule that works for pathogen management by using four different families of plants.
Identify Heavy, Medium, and Light Feeders
When I tried to find a good list of plants by feeding type, I found a lot of discrepancies. I recommend you make your own lists based on what you actually plan to grow and on your own experience in your garden.
Whether you like big agribusiness or not, they sure know how to manage nitrogen for optimal production. Checking nitrogen application rates for commercial fertilizers is a great way to identify your feeder type (even if you won’t be using their products).
Here’s the list I used to glean this information. It’s geared for Wisconsin, but the general reference tables have universal utility.
Page 43 starts a table of nitrogen application rates for many common crops. Those rates change based on the amount of organic matter in soil. Compost-rich beds need less nitrogen than tilled dirt because the biological life in the soil continues to make nitrogen if soil is kept moist.
A table on page 30 tells you how much potassium and phosphorous plants need—as well as which plants will remove it from the soil—which conveniently brings us to our next topic!
3. Rotate Cover Crops for Healthy Soil
In addition to rotating food crops, rotating cover crops is important for nutrient management. Different cover crops serve different functions.
Cover Crop to Remove Excess Potassium and Phosphorous
Compost adds humus and fertility to your garden. However, without good crop rotation, compost can overload soil with phosphorous and potassium in the long run. To prevent this, you need to rotate in plants that are effective at extracting those nutrients.
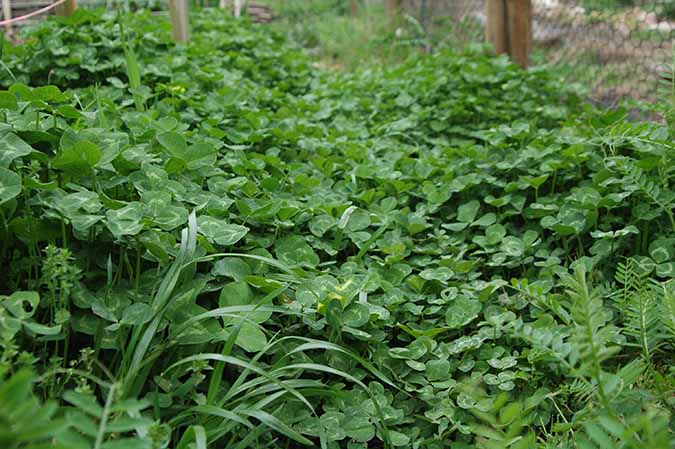
Alfalfa and red clover are exceptional at extracting potassium and good at extracting phosphorous. Hairy vetch and field peas are excellent for removing excess phosphorous. These plants are also potential nitrogen fixers.
For phosphorous and potassium removal, harvest the above-ground greens to feed your greens-eating livestock or add them to your compost pile for later application. Do not use them as chop-and-drop, or they will just end up right back in the soil. Always leave the roots in the ground, though, for nitrogen-fixing benefits.
Cover Crop to Add Nitrogen
Nitrogen fixers are plants that pull nitrogen from the air and store it in nodes on their roots. When the plants die, the nitrogen nodes decompose and release that stored nitrogen into the soil. Nitrogen fixers add more nitrogen when they are killed before they flower. If they set fruit (e.g., peas or beans), they are more like “nitrogen neutral.”
Nitrogen fixers work best when inoculated with a beneficial bacteria that encourages them to store more nitrogen. Planting rates are different for nitrogen fixing than for food production. To kill plants being used as nitrogen fixers, scythe or mow them to the ground. Leave roots in the ground and greens on the beds.
Cover Crop With a Biofumigant
Mustard is a beneficial biofumigant to break up soil pathogens and pest problems. Mustard also scavenges minerals in deeper soil and makes them available to plants that don’t root as deeply.
When using mustard as a biofumigant and mineral source, you need to purchase cover-crop mustard seeds (not edibles). Before the plants flower, cut them to the ground and gently turn them into your soil.
Cover Crop to Preserve Nitrogen
Grasses like wheat and annual rye are used as cover crops because of their ability to protect soil and scavenge nitrogen. While they don’t technically fix nitrogen like legumes, the biological organisms in your soil will quickly decompose those grasses if they are cut while green and allowed to decompose in the beds they were grown in. As the grass decomposes, it releases nitrogen into the soil at the surface, making it more readily available to next-round crops.
Choosing Your Cover Crop
Cover crops work best when selected based on either what you plan to grow next or on what you harvested, to correct for deficiencies. For example, corn is a heavy feeder. It sucks up nitrogen like a vacuum—as in, everything easily in reach.
After corn, wheat would be a good option. Wheat will pull nitrogen from all the areas the corn missed. If chopped and left on the bed, it decomposes and disperses that nitrogen more uniformly for the next planting (e.g., cucumbers).
Alternately, if nitrogen depletion is suspected, Austrian peas or clover used as a nitrogen fixer would work better than wheat. Rather than having a set schedule for cover crop rotation, make decisions based on the needs of your beds. There are fewer pests and pathogens in cooler weather, so strict rotations are not as necessary with winter cover crops.

4. Rotate Your Homemade Amendments by Crop Needs
If your main amendments are of the homemade variety, you also want to consider rotating the kinds of amendments you put on your beds along with your crops.
4 Types of Compost and Their Uses
Humus Compost
Humus compost is the stuff made by layering browns and greens at a ratio of 25 parts carbon to 1 part nitrogen, making a large pile that heats to at least 130°F, turning it a few times, and then allowing it to age for 2 years. Humus increases the air- and water-holding capacity of soil and allows biological life to thrive. This kind of humus compost doesn’t have a lot of nitrogen.
Fresh Compost
The biological life that makes compost also creates nitrogen through their digestive processes. The longer a pile ages, the more nitrogen and other nutrients leach out by way of rain, air, etc. Fresh compost is made by the same process as humus compost. It’s just been aged less than six months and so has more nitrogen.
Composted Manure
Composted manure—i.e., a pile of manure mixed with fallen feed and bedding materials not necessarily at a rate of 25:1—can radically vary in nitrogen and nutrient content. Store-bought chicken manure has a 3-2-3 rating for NPK. Meanwhile, uncomposted chicken manure could have an NPK rating of 40-60-40, 55-55-47, or other variations.
Personally, I use a mix of chicken and goat manure that’s been aged for 3-6 months as a nitrogen source. I don’t know the exact nitrogen content, but it doesn’t burn my plants and it grows huge corn and cabbage.
Mystery Compost
Mystery compost happens when you throw a bunch of stuff together and wait. The nitrogen content will vary by what’s in the pile and what decomposed it. You could just throw it on your beds fairly fresh and hope you get lucky! Or, you could age it and use it for humus.
With these compost definitions out of the way, on to when to use them for nutrient management crop rotation.
Rotating Compost Applications for Nutrient Management
Here’s what my amendment rotations generally look like:
Year 1: Apply 4 inches of fresh or manure compost.
The risks from E. coli and other bad bacteria are minimized if your compost materials are 6 months old when your food is harvested. If you are growing lettuce, aim for 6-month-old compost to start. If you are growing vegetables like winter squash, aim for 3-month-old compost, because it will be over 6 months old by the time you harvest.
Year 2: Apply 2-4 inches of humus compost
Humus compost will still provide some nitrogen and other nutrients. Mainly though, it will help preserve any leftover nitrogen from the fresh compost in year 1 and replace the organic matter you harvested.
Year 3: Apply 2 inches of mulch to preserve moisture.
By year 3 in this plan, you are organic-matter heavy. You may also have extra potassium and phosphorous. For light feeders, just use mulch to protect your soil and preserve moisture rather than piling on compost.
Mulch is essentially browns with no greens. Straw, leaves, or wood chips work well. Mulch will eventually decompose and add nutrients, but not within the planting period that you apply it.
Year 4: Add nitrogen; remove phosphorous and potassium.
This is when you want to plant your nitrogen-fixing, phosphorous- and potassium-extracting cover crops.
Personally, I like to eat some peas and beans, too. I plant peas and beans to eat in early spring through mid-summer. I cover-crop from late summer through winter. I mulch the plants I grow for me and leave them on the beds. I remove the greens and leave the roots from my cover crops.
Year 5: Soil test and repeat.
Start the cycle again. But first, get another soil test and make adjustments as necessary. That second soil test is like a report card on how you are doing with your crop rotations for nutrient management.
Be Flexible in Your Use of Amendments
Just like with cover-crop rotations, if your beds seem depleted, then you may need to add fresh compost rather than humus compost. You may want to add humus compost rather than mulch if your beds feel dirt heavy and humus short. You may also need to up your game at times and apply worm castings or other stronger amendments. Use the health of your crops as your guide.
Crop-Rotation Conversation—What Do You Think?
To do crop rotation really well, you need to make it specific to your soil, pests, pathogen risks, crops, and amendments. There’s no canned crop-rotation plan that is going to work well for every garden.
Personally, I love the challenge of figuring out effective crop rotations. Gardening could get boring really fast if you weren’t taking your skills to the next level, paying attention to your plants, and improving your processes.
My intent with this series has been to inspire you with some of my crop-rotation concepts. Now, I’d like to hear from you!
What kind of rotations are you thinking of, what are you using now, and what is your intuition telling you? What works? What doesn’t?
(Also, include your growing region and soil type (loam, sand, clay) if possible so others can decide whether your ideas will work for them. I started with clay, but now have what I call clay-loam.)
Please join the conversation on crop rotation and share your comments below!


Tasha Greer is a regular contributor to The Grow Network and has cowritten several e-books with Marjory Wildcraft. The author of “Grow Your Own Spices” (December 2020), she also blogs for MorningChores.com and Mother Earth News. For more tips on homesteading and herb and spice gardening, follow Tasha at Simplestead.com.


COMMENTS(4)
You’re a wealth of knowledge. Keeping track of crop rotation and all those nutrients makes my head spin. Thanks for the information.
Hey Scott – Yes – It’s a lot to take in at first. But, honestly, it gets automatic pretty fast. It’s also almost analogous to the way commercial farmers apply different kinds of fertilizers to different crops at different times in the growing cycle. Also, you’re own observation skills start to tell you what your soil needs next.
I first realized I could get better yields in my vegetable garden rotating my amendments because I was paying attention to the weeds in our food forest areas as I applied different mulches.
Six months after I applied double-shred hard wood, we had an explosion of 2 foot tall wood nettle and 4 foot tall ragweed. The wood nettle may have come in with the mulch, but there’s no ragweed growing in the forests being logged around here, so those seeds were probably dormant in our soil and activated by the influx of nutrients as the wood mulch decomposed.
After that, when I applied loads of straw to the same area, we got an explosion of common and narrow plantain plants and the wood nettle grew twice as tall. The ragweed, however, became severely stunted. It started going to seed out when it it was only 6 inches tall. Turns out, ragweed is more invasive weed when nitrogen is high and water content is low. Decomposing straw, on the other hand, is lower in nitrogen than decomposing wood mulch. But after two applications of heavy mulch, my soil was becoming a sponge – perfect conditions for plantains (that like moderately rich soil) and wood nettle (that loves organic matter). Not so good for ragweed…
After that, I started experimenting with various amendments as a way to control weeds in my garden and stumbled on to the benefits for increased yields and better soil health as well.
I bet your extensive wild food and weed knowledge will serve you well in coming up with great rotations for a tame vegetable garden!
Great article, thank you.
Thanks for reading! Good luck with your garden!