CAUTION: This article, and the photos in it, include graphic details about hog butchering. If you are disturbed by information and images of this nature, please use your own discretion when determining whether to read further.
This is part four in a multi-part series on processing pigs at home. If you’ve been following along, in the previous posts, we’ve covered preparing for the slaughter, making the kill, and post-kill processing including hair removal, evisceration, and head removal. We are now onto the hog butchering process.
In case you missed those earlier posts, here are the links:
Article #1: “Preparing for a Pig Slaughter”
Article #2: “The Pig Slaughter”
Article #3: “Hog Processing: Skinning, Scalding, Scraping, and Eviscerating”
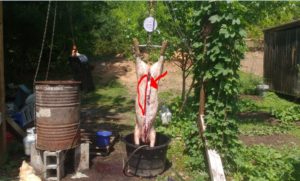
Hog Butchering While the Carcass Is Hanging
Now, it’s time to turn a carcass into useful meat cuts on the homestead. At the grocery store, you usually find tenderloin, pork chop, Boston butt or shoulder roasts, precooked hams, presliced cured bacon, and baby back ribs.
You can certainly try to duplicate these cuts at home. However, when you process at home, you have more options about how to make your cuts. Since we only process a few pigs a year, we try new techniques for making roasts, ribs, and chops each time. But, there are a few key cuts we always make.
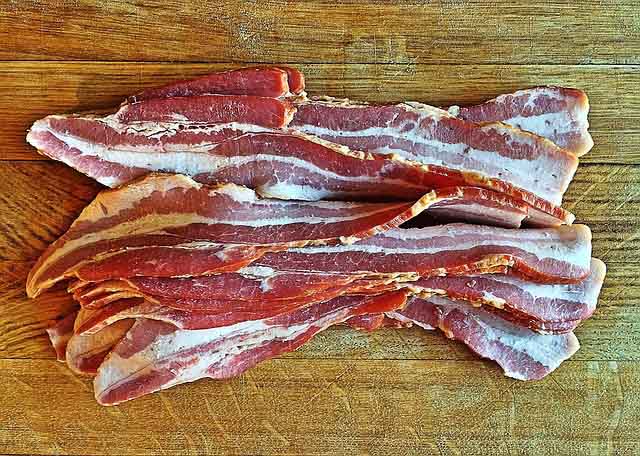
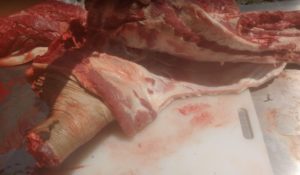
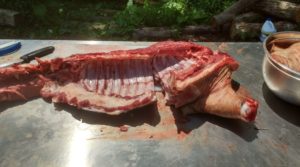
1. Make the Belly Cut
The first cut we make is to remove the belly. Doing this makes it easier to remove the tenderloins and to cut the carcass in half.
Pig ribs are very similar in shape to human ribs. They start wide near the sternum, then taper toward the waist. The belly area, which can be used for bacon, is basically the fat-covered muscle area that runs between the two sides of the ribs and in the bone-free area between the ribs and pelvis.
Some bacon lovers even cut up and over the ribs and use the back meat for bacon. This works well with market-style pigs like Yorkshires. However, with our pasture-raised Berkshires, there’s just not enough fat marbling to make good bacon from that area.
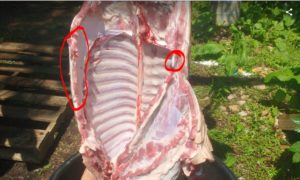
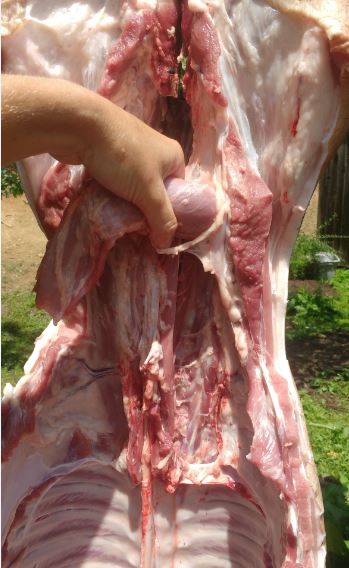
The only tricky part about removing the belly is that as the ribs begin to widen, there are soft-floating ribs that are tender enough to slice with a knife. Sometimes, in our eagerness to get more bacon, we cut too close to those floating ribs and end up with bits of them in our belly cut.
In the photo below, you can see where I cleared them on the first belly I removed, but nicked the first one on the other side and had to readjust my knife before continuing to remove the belly.
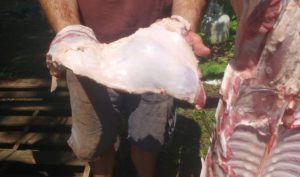
The non-skin side of the belly is covered with a layer of fat called leaf-lard. Use your fingers to pry that layer of fat off the meat. You can render that separately for use as “pastry lard” (if you have enough of it). Or just lump it in with the rest of your lard trim for later use.
Once you have removed both sides of the belly, next up is the tenderloin.
2. Remove the Tenderloins
The tenderloin is the most tender cut of meat because those particular muscles don’t get as much use as areas like the shoulders. They are located inside the carcass, on either side of the back bone near the hind legs. Some people call them filets because of their fish-like shape.
Tenderloins should be removed before you begin to halve the carcass. Once you locate them, gently cut around the connective tissue holding them in place. Work slowly so you can get every bit of this delicate cut.
3. Split the Carcass
Now you are ready to split the carcass into halves. Cut a line down the skin and meat side of the back as a guide. Then saw from the inside of the carcass following the spinal cord. If you get off course, back your saw up and straighten your cut.
Now that you’ve got your carcass cut into manageable pieces, you can take it off the gambrels and over to your work table. This is easiest if you have two people, each taking a side, and remove the halves simultaneously. If you have to do this alone, put a tarp down to catch the other half of the carcass in case it slides off the gambrel when you remove the first side.
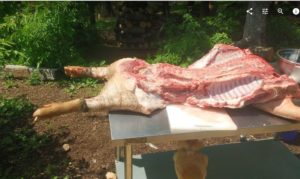
Hog Butchering on a Tabletop
For the rest of this process, we use a stainless steel table and keep a few large cutting boards handy to cube trim for sausage and clean up roasts.
1. Remove the Hocks and Trotters
Hocks and trotters come off first for us. We use a knife to cut at the knee joints and a saw to go through the bone.
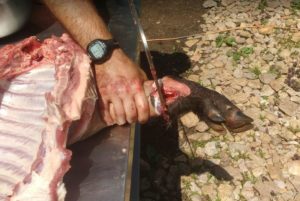
We aren’t so fond of eating these, so we use them as treats for dogs or chickens. They don’t mind the hair and skin, so we don’t bother scraping these areas.
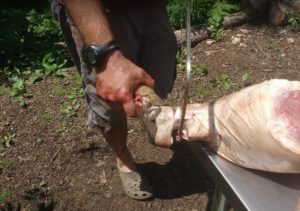
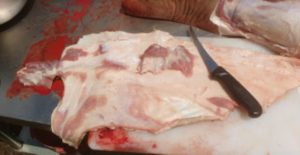
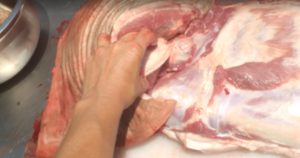
2. Separate the Hams
We cure and cold-smoke our hams so they can be stored without refrigeration. For country ham curing, we like to keep just a short hock on the ham (as shown in the photo above and below). For prosciutto-style hams, we just remove the trotter (foot) and leave the hock long.
I like to rotate the ham around the hip joint to find the narrow point for separating the ham. Leave the ribs facing down on the table and roll the skin side of the ham in the opposite direction. Cut around the meat to the bone. Then use a saw to cut through the bone.
The last step is to trim up the ham to make the front face mostly smooth for curing. Any scraps of meat or fat you remove can be put in a trim pile for use in sausage or as cubed meat for stewing.
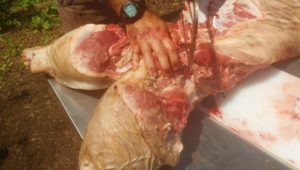
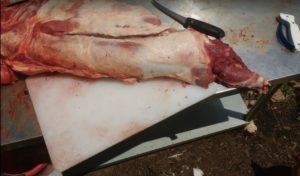
3. Remove the Back Fat and Skin
From this point forward, there are lots of different ways to butcher a pig. I love pork skins. So, I try to remove the skin and back fat in large slabs. I put the skin-side down and use my knife to separate the skin from the meat.
Once I have a large slab, I trim off any residual meat for my sausage meat pile. I put the fat in our freezer to chill it, because that makes it easier to remove the fat from the skin.
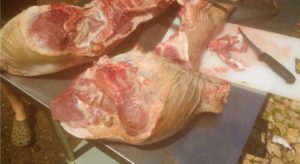
4. Cut the Pork Loin
After you have removed the fat and skin, you can see the long strip of muscle that runs along the spine next to the ribs. This is the loin.
We’re not big fans of pork chops, so we usually cut this into 3-4 roasts. We prefer to use the fat for lard and sausage, so we don’t leave much on the loin.
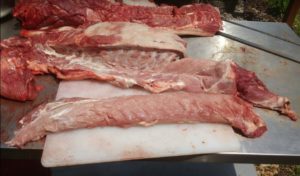
5. Separate the Ribs
We love our ribs, and pigs can have between 15 and 17 of them. We have no problem sucking meat off the bone or even off the floating ribs.
We like to cut what we call “dinosaur ribs.” Basically, we separate the shoulder from the ribs. Usually though, we break the shoulder area about 4-5 ribs down from the neck.
We use the saw to cut off the spine so we can fit the ribs in our pot. We follow the spine closely, though, rather than cutting down the center of the ribs to make classic baby back ribs.
6. Cut the Shoulder and Picnic
The shoulder is the area above the front leg or picnic. The meat in the front leg has lots of silver skin and is not very tender. We usually cut that up and use it for sausage. Then, we cut multiple 2-pound roasts from around the shoulder blade.
For one of our shoulders, though, we kept the leg with the shoulder, removed the skin, and slow roasted that entire primal cut. We also saved another one to try cooking in a hot smoker in order to make a several-month supply of prepared pulled pork to enjoy all summer long.
Miscellaneous
As you are making all these cuts, you’ll be able to cut trim from odd-shaped roasts, areas around the bones, and in spots where the meat has more ligature. You will also be able to cut extra fat from your belly cut, the back, and around some of the muscles. As we are making our other cuts, we also cut all that trim into pieces that fit into our grinder and throw the fat into one bowl and the meat into another to use for sausage later.
The bones that we cut from the meat—such as the spine, shoulder blade, and front leg bones—go into the stockpot for making bone stock. Extra bits of skin that aren’t used for pork rinds also go into the stock to make gelatin. You can read more about how we make bone stock here:
Read More: “Benefits of Bone Broth: Myth or Magical Mystery?”
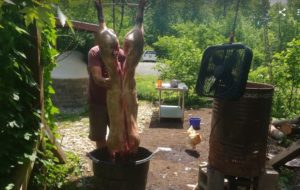
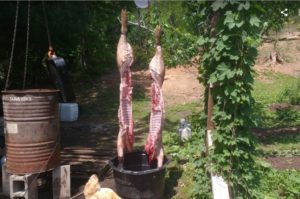
Hog Butchering in Warm Weather
In cold weather, we can allow our pig to hang overnight to chill the meat. This makes hog butchering a lot easier. However, when processing in late spring (as in this photo series), we have to work quickly to get everything safely processed.
We have a marine cooler lined with frozen bottles of water sitting in the shade ready to hold cuts.
We don’t use ice because we don’t want our meat cuts—like the belly or hams—to take up extra water before we cure them. We keep a fan blowing in the area where we are working to keep insects away.
My partner, Matt, and I, work as a team. As one of us butchers, the other immediately takes the cuts and puts them in the cooler if more processing is necessary. Roasts and ready-to-cook cuts are immediately packaged and put straight into the freezer.
Fall or early winter is certainly our preferred time to butcher. But there are ways to make processing safe at home even in warmer temperatures.
Now that we’ve got hog butchering wrapped up, our next installment in this series will be on some post-butchering preparations, like making country ham and bacon. In the meantime, I am going to go cook up those tenderloins and savor the flavor of pork that’s been raised, processed, and prepared at home.
How about you? Do you have any hog butchering techniques, cuts, or preparations you prefer? Let us know in the comments section below.


Tasha Greer is a regular contributor to The Grow Network and has cowritten several e-books with Marjory Wildcraft. The author of “Grow Your Own Spices” (December 2020), she also blogs for MorningChores.com and Mother Earth News. For more tips on homesteading and herb and spice gardening, follow Tasha at Simplestead.com.


COMMENTS(3)
What??? You don’t make pickled pigs’ feet or smoked ham hocks???
Smoked ham hocks are the bomb for bean soup. And pickled pigs’ feet are a Southern bar staple.
Curb that waste!
Alright – you talked me into it! I’ll have to try next time we process pigs. Can you happen to direct me to any good recipes? My past experiences weren’t so successful…Thanks for reading! Tasha
Well, now I’m just hungry for bacon. 😉