Dehydrator Recipes for Healthy Snacking
Buying a dehydrator can be an investment. But if you’re someone who likes to eat healthy snacks, it’s an investment that can pay for itself quickly. There are lots of healthy snacks that you can make easily, at home, with simple dehydrator recipes.
If you missed my first article on this subject, you can read it here: 5 Dehydrator Recipes for Home Grown Fruits and Vegetables. I covered DIY smoothie powders, drying herbs, fruit leathers (the kind you can ‘roll up’), drying things for salad dressings, fruit chips, popsicles, and even more.
Dried Nuts, Seeds & Trail Mixes
Soaking nuts and seeds overnight is a good practice to follow to release their enzyme inhibitors, making them much more digestible. Once you’ve drained and rinsed them, now what? Sure, you might want to use some right away in a recipe or two, but maybe you want to save some for later.
This is where your trusty dehydrator comes in handy: simply spread a layer of nuts or seeds on mesh sheets and dry, then store in vacuum sealed bags or in containers with tight fitting lids. Your dried nuts and seeds can then be used in any future recipe or ground to make “flour.”
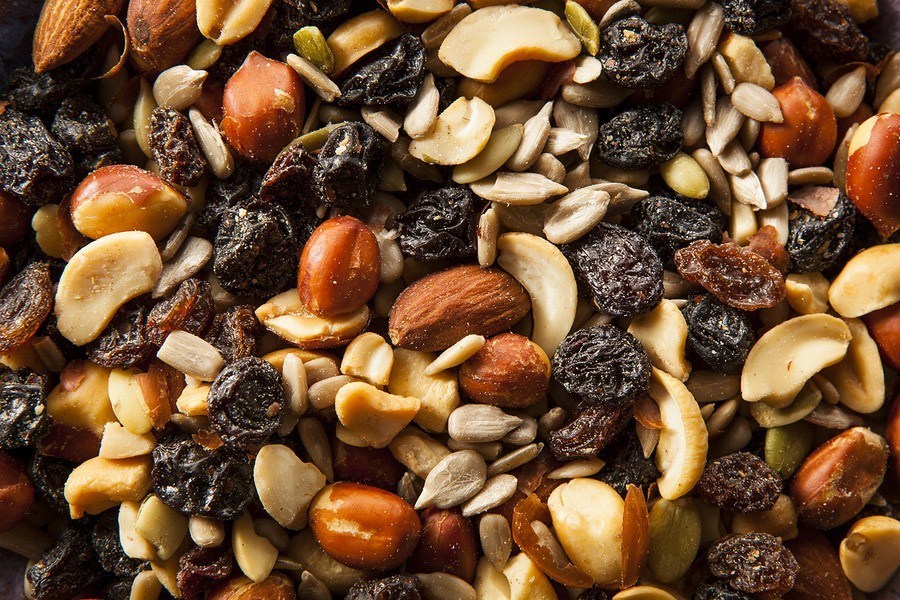
You can also marinate your nuts or seeds (such as with tamari) or add spices (such as curry) before drying to give them some kick. Another idea is to make your own trail mix, which is a lot cheaper than buying from health food stores. You avoid the added sugar and oil, plus you can customize them to make them sweet or savory. Here’s a spicy recipe to keep you going while you’re out on the trail:
Spiced Up Trail Mix Recipe
• 1 cup nuts, soaked 4-8 hours (could be one nut like just almond or a mix like cashew, pecan, walnut, etc.)
• 1/2 cup pumpkin seed, soaked 4-8 hours
• 1/2 cup sunflower seeds, soaked 4-8 hours
• 1 1/2 TBsp tamari (gluten-free if need be) OR coconut aminos
• 2- 3 pinches chili spice OR cumin OR curry
• 1 tsp melted coconut or olive oil (optional)
• 2-3 pinches sea salt (optional)
Instructions: After soaking nuts and seeds for several hours, drain and rinse well. Whisk the tamari/coco aminos, spices and oil (if using) together. Taste test marinade first to see if it’s to your liking and add more spice or salt as you prefer. Add marinade to nuts and seeds to coat well and let marinate at least 30 minutes. Drain any excess marinade from nuts and seeds, and dry at 115F on mesh sheets until dry. Let cool 30 minutes before storing.
Nori Trail Food Wraps
Now you know seaweed is good for you, with all those minerals! Pair that nori with your fave pate (could be a bean pate, a veggie pate, a green pesto, etc.) and you have some DIY yummy-licious trail food nori wraps that are much healthier and cheaper than the pricey store-bought ones.
Instructions: Place 4 sheets of nori on 1 dehydrator mesh tray. Spread the pate rather thinly onto a sheet of nori (a basting brush can help with this task), leaving a tiny space (about 1/8th inch) bare at the end of one of the shorter sides. Repeat with rest of nori and pate. Dehydrate at 115F until almost dry, but the nori is still tacky (4-6 hours). Roll one of the nori, applying a bit of water onto the edge you left bare, and seal the nori. Repeat with rest of wraps. Continue to dehydrate until completely dry, several hours more.
Notes: 1- If the nori is somewhat tacky and it won’t be good to use as trail food – don’t worry – it’s still completely delish! Store the tacky ones in the fridge. 2- You can use a somewhat thicker layer of pate, but note that the more you use, the longer it’ll take to dry. Also note that if you use too much pate, they’ll be too hard to roll, but you could still eat them as open-faced wraps. 3- No need to make just 4 at a time, feel free to double or triple the recipe!
Sprouted Grain & Bean Flours
Some folks like to sprout their grains and beans. Whatever for? They make for easier digestion and some say they are superior in terms of nutrition.
Once sprouted, you can use your reliable dehydrator to dry them, then use a high speed blender or grain mill to render them into a powder. If you’re wondering what kinds of grains and beans, most can be sprouted, with each having their own germination rate: quinoa, hulled buckwheat groats, spelt, rye, mung bean, black bean, adzuki bean, chickpea and lentil are but a few that make for tasty flours. You can buy an automatic sprouting machine that does all the work for you or DIY cheaply using an old glass cookie jar, a mason jar with a wide mouth or a colander.
Instructions: Place enough grains to cover the bottom of the glass jar and fill to the top with water. Place a piece of cheesecloth or cut a square of mosquito netting (yes, the kind that you use on your door, purchasable at hardware stores) and secure with an elastic band. Soak 8 hours or overnight.
Drain and rinse well. Rinse the grains with water 2x a day until they develop small tails. Quinoa takes 1-2 days while most grains average 3-5 days. Keep in mind that heat and humidity are factors affecting germination time. For beans, simply add to a bowl with 2-3 times the amount of water to cover and soak 8 hours or overnight. Drain, rinse well and leave in a colander to sprout. Rinse 2x a day with water until they develop small tails. Chickpeas take 1-2 days, small beans like lentil and adzuki take 2-3 days while large beans like black beans take 5-6 days.
Once your grains are sprouted, place onto solid sheets to dry in the dehydrator. Sprouted beans are fine on mesh sheets. Once dried, grind into a powder using a high speed blender (you can buy a grain mill attachment for this purpose) or use a grain mill. If you ever find that the powder feels somewhat moist, simply place the powder on a solid sheet and dry again in the dehydrator.
Exceptions: Soak buckwheat groats and chickpeas for 30 minutes maximum (otherwise they tend to ferment). You can also rinse buckwheat groats and chickpeas 3x a day.
Bonus Idea: Did you know that you can marinate those sprouted beans using your favorite marinade before drying, and then use them as a tasty snack or trail food? Yes indeed, you can! In the trail mix recipe above, sub in 2 cups sprouted chickpeas instead of the nuts and seeds, bump up the spice in the marinade to 1 tsp, and you’ve got yourself some spicy “chichers!”
Now that you’ve got your own milled flour, it’s time to get to baking! Isn’t it wonderful to make bean flours that aren’t sold in stores, like navy bean and lima bean flour? What a joy to make quick breads, no-bake bliss balls and other treats with the goodness that you’ve sowed! Plus, sprouted grains like quinoa and buckwheat make for some tasty and crunchy morning cereals! Simply add in some cold or warmed up milk or non-dairy milk, fresh or dried fruit, a bit of stevia or honey to taste, and perhaps a pinch of cinnamon or turmeric, and dig in!
Video – Easy Seed Sprouting: Grow Sprouts and Microgreens Indoors All Winter Long
Flax Crackers & Wraps
Making your own flax crackers and wraps is such a classic yet cheap way to use your dehydrator and get in your omega-3s. Crackers are made using whole flax seeds, often soaked beforehand and left whole or pureed, or they can be made by rendering the flax seeds into a “flour.” Wraps are made using pureed flax seeds (often soaked beforehand) or using flax seed “flour.” Both crackers and wraps can be made with a host of other ingredients, including seeds, nuts, veggies, fruits, herbs, spices, sweeteners, and even liquids such as stock, cooking water and herbal infusions and decoctions; hence they can be a sweet or savory bread or chip! No need to get fancy, however, as simple flax recipes can be mighty tasty:
Simple Flax Wrap or Cracker Recipe
• 1 1/2 cups flax seed
• 1 avocado
• 6 cups carrot water from boiling carrots OR water*
Instructions: Grind the flax in a dry high speed blender. Add in the avocado and water. Blend on low and then increase the speed gradually so all is mixed to a smooth consistency. Pour onto 3 solid sheets and dehydrate at 145F for 2 hours, then reduce to 115F. When the top side is dry, flip, peel off the solid sheets and continue dehydrating on mesh sheets until dry. Using clean scissors, cut into 9 (or more) square shapes for crackers or into 3 long strips to use as wraps.
*Feel free to use 6 cups of your favorite stock or any other leftover cooking water.
Here’s a more elaborate recipe using veggies and spices to make some spicy flax crackers:
Curried Carrot Crackers Recipe
• 3 cups shredded carrots
• 1 cup shredded onion
• 2 TBsp olive oil
• 1-2 tsp cumin
• 1-2 tsp coriander
• 1-2 tsp turmeric
• 1/2-1 tsp ginger
• 1 tsp sea salt
• 1 cup ground flax seed, soaked in 1 cup water (let flax absorb water)
• Honey or stevia, to sweeten (optional)
Instructions: Puree ingredients except flaxseed in a food processor, adding in a bit of water if needed. Add in flaxseed. Spread evenly to 1/4 inch thick on 2 solid sheets and dehydrate at 145F for 1-2 hours then lower to 115F. Flip and peel away solid sheets. On the wet side of this “dough,” score crackers halfway through using a ceramic or plastic knife into 9 large squares (or smaller, as you prefer). Continue drying on mesh sheets until dry.
Kale Chips
Have you seen those tiny packages of kale chips and the crazy price they go for in health food stores? And have you looked at the ingredients and realized they are plenty fatty and salty? Why bother, when you can make your own for cheap and customize them to your preference: using seeds instead of nuts (less fat), no seeds or nuts (fat-free), dulse or kelp instead of salt, and stevia instead of evaporated cane sugar.
Plus, you can also use cabbage, bok choy and collard instead of kale, and, if you are sensitive to goitrogenous veggies (that interfere with thyroid health, such as the Brassica/mustard family), you can steam them lightly before turning them into chips.
There are many recipes out there that you can adapt to make your own recipe, such as lemon dill, BBQ, and nacho – all healthy, greeny good for you. Here’s a recipe that was taste tested in a natural health food store, much to the customers’ delight! Not only were the chips met with rave reviews, but they are made using freshly ground sesame seeds that beat store-bought tahini any day:
Cat’s Goddess Kale Chips Recipe
• 2 large bunches kale
• 3/4 cup sesame seeds -> grind them in a coffee mill
• 1/2 cup apple cider vinegar with “mother”
• 1/4 cup tamari (gluten-free if need be) or coconut aminos
• 1/4-1/3 cup water
• 2 bunches green onions, white parts only OR 6-8 shallots
• Juice of 1 lemon
• 2 tsp chopped garlic
• 1/2-3/4 tsp sea salt
Instructions: Remove stems from kale with a knife and tear into bite size pieces or rip kale leaves from stems and then tear into pieces. Whip rest of ingredients in a high speed blender with 1/4 cup water. Add a bit more water, if necessary, to get a thick paste – NOT a watery vinaigrette. Put kale in a large bowl and pour dressing over kale; massage leaves well to ensure all are coated. Let marinate 30 minutes. Spread onto 2 solid trays and dry at 115F for 6-8 hours. Feel free to double or triple the recipe as kale chips are rather addictive!
Note: You’ll find that using heating shallots pays homage to the chip’s goddess name, while using green onions lends a much milder version.
Bonus Idea: Juice and nut pulp “flour.” What do you do with your juice and nut pulp? Do you just throw it in the compost or feed it to your worms? While that’s fine and dandy, another idea is to dry the pulp and grind it into a powder to add a boost of fiber to your smoothies, soups, stews and baked goods. Simply spread a thin layer of pulp onto a solid sheet and dehydrate ’til dry; then grind to a powder in a dry high speed blender and store in a cool, dry place.
Tips: 1-You can keep the pulp frozen in the freezer until you have a good amount, then thaw and spread onto sheets to dry. 2-If the powder feels wet, simply return to the solid sheets and re-dry in the dehydrator.
If you liked these ideas, check out my other article about finding ways to reduce your food waste: 9 Ways to Eat Commonly Wasted Seeds, Stems, Peels & More


Cat Wilson is a holistic health practitioner who loves plants and meditation. When she isn’t working out or writing, you can find her hugging trees and talking to the wild weeds in her garden. Grab a gluten-free recipe or get some help with going vegan or mindfulness at her website or on her YouTube Channel: Cat’s Raw Paw.


COMMENTS(16)
Thank you so much for giving me more ways to use my dehydrator!
You’re welcome, Linda Glad you have new recipes to try and enjoy 🙂
This was a great article- it has given me so many new avenues to explore with my dehydrator. Thank you.
You’re welcome, Sleepydog! Have fun with your dehydrator food adventures 🙂
thank you very much. lots of recipes for today :)) I will try to do all omg. per item per day. :)) love it. <3
Happy dehydrator food trails, Helen Nicole 🙂
lots of recipes. i want to learn all. I will try to do all it soon. per item per day. you make me love cooking more
Hmm those Kale chips sound bomb! Going to try those out this week
Many recipes in there and very informatic post. I like Nuts eat every day, especially winter. Thank you so much for the great post.
Dehydrator Recipe is looking yumm! I will try this tonight. Thanks for the recipe
Make a cider vinegar and honey drink every evening for good health
With havin so much content do you ever run into any problems of plagorism or copyright violation? My website has a
lot of unique content I’ve either authored myself or outsourced but it
appears a lot of it is popping it up all over the
web without my agreement. Do you know any methods to help prevent content from being stolen? I’d
truly appreciate it.
Hi there to every one, the contents present
at this web site are in fact amazing for people knowledge,
well, keep up the nice work fellows.
I as well as my pals ended up reading through the best pointers on the website while then I
had an awful suspicion I never thanked the site owner for those tips.
All the boys were happy to read through all of them and already have absolutely been having
fun with them. Many thanks for truly being simply thoughtful and also
for deciding on this sort of brilliant issues most people
are really needing to understand about. My honest apologies
for not saying thanks to you earlier.
As I site possessor I believe the content matter here is rattling great ,
appreciate it for your efforts. You should keep it up forever!
Good Luck.
I believe this website holds very superb written subject material posts.